Creative Night Portrait Ideas for Cinematic Looks
April 02, 2025

Night portrait photography lets you explore a whole new range of moods and styles that simply aren’t achievable during daylight. It also allows you to capture cinematic aesthetics and atmospheres you won’t typically find in a studio environment.
In this article, we’ll explore creative ideas to inspire your next night-time portrait shoot, along with useful editing tips to make your images look like they have jumped from the big screen.
Let’s go!
How to Take a Good Night Portrait?
 Taking a strong photo in-camera is essential, as editing alone can't fix every problem. Here are some key things to consider when capturing street portraits at night:
Reducing Noise in Night Portraits
The best way to reduce noise in your images is to ensure you're shooting with enough available light. Position your model near streetlights, neon signs, shop fronts, or consider using portable lights. Properly lighting your subject’s face is especially important to clearly capture their details and expressions.
Best Camera Settings for Night Portraits
Aperture | Shoot with a wide aperture, typically between f/1.8 and f/2.8, depending on your lens. This allows more light into the camera for sharper images and creates appealing bokeh in your background lights. |
Shutter Speed | You can't set your shutter speed too slow for night portraits, or you'll risk motion blur from the model moving slightly or camera shake. Aim for around 1/125 sec. Keep an eye on your camera preview and adjust accordingly. |
ISO | ISO should always be adjusted last. Increasing your ISO will brighten your image, but higher ISO also introduces more noise. Each camera handles ISO differently, some cameras produce clean images even at 1000 ISO or higher, whereas others struggle above 500 ISO. Get familiar with your camera's limits through experimentation and stick to an ISO range that maintains image clarity. |
Additional Tips for Night Portrait Photography
Shoot in RAW: Always shoot in RAW rather than JPEG. RAW files contain much more data, particularly in shadows and highlights, allowing greater flexibility when editing. This is crucial for the next tip.
Expose for the Highlights: One of the most critical pieces of advice for night photography is to expose for the highlights. Ensure your brightest areas, such as neon lights, street lamps, or any strong artificial sources, retain details and aren't blown out.
Your photo might appear slightly underexposed in-camera, but you’ll be able to recover shadow details more effectively later. Recovering details from shadows is much easier than recovering details from overexposed highlights, even with RAW images, so make the highlights your priority.
White Balance: Avoid using auto white balance in street portraiture at night. Artificial lights (especially streetlights or neon signs) can significantly alter the colour temperature, affecting the consistency of your photos. Instead, set your white balance manually to match your shooting environment, giving you consistent and natural-looking tones.
By following these guidelines, you’ll consistently produce high-quality, professional-looking night portraits, perfect for showcasing in your portfolio and impressing potential clients.
You may also like: Cinematic Portraits Tutorial: Lighting & Composition Guide
8 Creative Ideas for Night Portraits
 Now, let’s look at some creative ideas you can try for your next night portrait photography session.
1. Movie Scenes
Take inspiration from your favourite movie scenes. Pay close attention to how these shots are composed, how the subjects are posed, and where the lighting is coming from. What mood does the lighting create? Make notes about everything that catches your eye in the scene, and then scout similar locations around your city to help recreate the atmosphere.
While trying to emulate the original scene, you'll naturally begin introducing your own style, adjusting poses, and adding new creative touches. In doing so, you'll still capture the cinematic essence of the original shot, but with your own personal twist.
2. Neon Lights and Cyberpunk
Take your portraits into the future with a cyberpunk-inspired shoot using neon lights. Enhance the futuristic aesthetic by choosing outfits that match the theme and adding cooler blue tones or vibrant colour grading in post-processing to make the image stand out and look extra cinematic.
3. Silhouettes
Use silhouettes creatively in your shoot. Place your subject directly in front of a strong light source, such as a street lamp or neon sign. You can have your subject facing towards or away from the camera, with silhouettes creating dramatic results and intriguing storytelling opportunities. These kinds of photos will emulate the noir films of old and bring a nostalgic element to your shot.
4. Bokeh City Lights
Set your subject against a beautiful cityscape at night. Shoot with a wide-open aperture (such as f/1.8 or f/2.8) to achieve a stunning bokeh effect from the city lights in the background, which creates a cinematic and appealing look.
5. Rainy Mood Shots
A rainy night can lead to eye-catching portraits if your subject doesn't mind getting wet. Reflections from streetlights or neon signs bouncing off wet surfaces can produce visually striking images. The reflections and glossy textures will enhance mood and atmosphere, capturing attention immediately.
6. Smoke and Mist
Introduce smoke or mist to your shots to create a mysterious and ethereal atmosphere. Shoot around streetlights or neon signs to illuminate and highlight colours within the smoke. Your subject can be partially obscured or silhouetted for added cinematic drama and intrigue.
7. Reflections
Use mirrors, puddles, or other reflective surfaces creatively to add depth and visual interest to your portraits. Position your subject alongside the reflection and make sure both your subject and the reflected image are well-lit to capture their details effectively.
8. Long-Exposure
Capture dynamic long-exposure portraits by having your subject remain still as lights move around them, such as traffic or pedestrians. Alternatively, attach portable lights to your model and have them create shapes through motion. This technique results in unique, artistic night portraits.
You may also like: How to Create a Comfortable Atmosphere During Portrait Sessions
Editing Your Night Portraits
 As every photographer knows, taking the photo isn't the end of the job, we also need to edit our shots. Night portraits require a slightly different approach compared to standard daytime portraits.
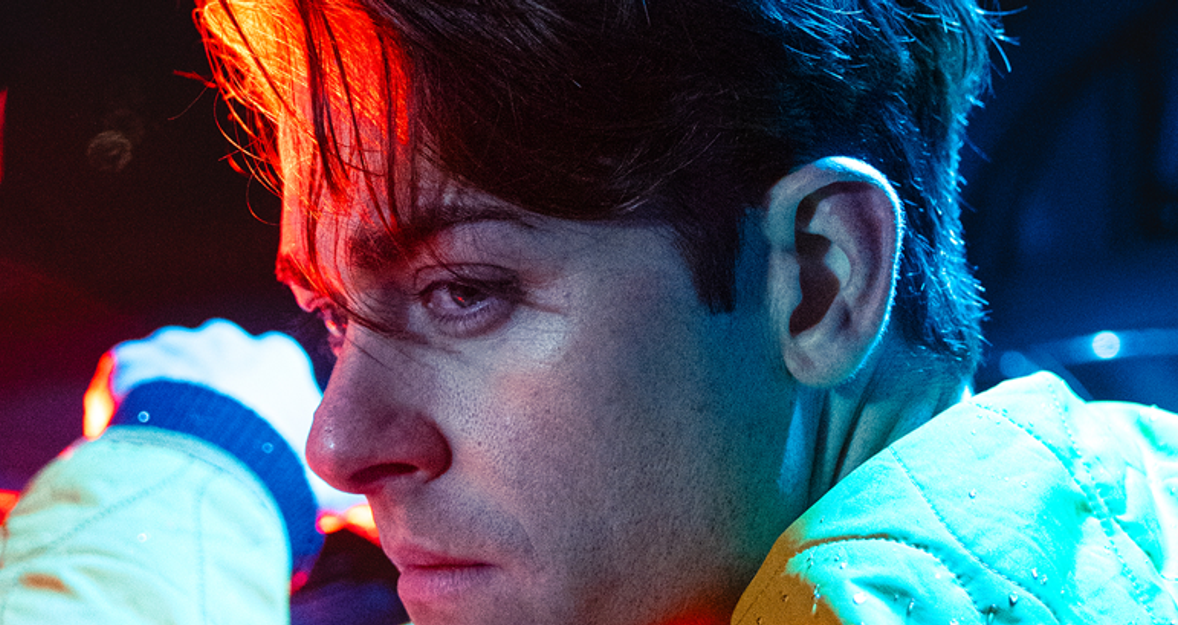
For example, maintaining natural skin tones isn’t always as essential with night portraits. This is because artificial lighting, like neon signs or streetlights, will cast unique and interesting colours onto your subject's skin. Rather than removing these colour casts, embrace them as they help your photos look vibrant, unique, and authentic. Attempting to remove them can lead to unnatural results.
Night portraits also benefit from more creative freedom during colour grading and this is how we can achieve a cinematic look. Because these images often contain darker areas, you can experiment by introducing tones into shadows, midtones, or highlights. Cooling down your overall image temperature or adjusting specific colour tones can look especially effective at night, adding atmosphere and enhancing your image's storytelling quality.
Look at your favourite movies and scenes and ask yourself how those tones can be achieved. Look closely at the most prevalent colours within the shot and introduce those into your photo through colour grading.
Recommended Editing Software: Aperty
 Many editing software options are available, but one that particularly stands out for portrait photographers is Aperty. It’s a specialised portrait-editing software designed to give you professional results quickly and easily. You don’t need extensive training to start producing excellent images, as Aperty uses powerful AI technology to do most of the heavy lifting for you. It also offers batch editing, helping you save time and get back to shooting more quickly.
Here’s a quick overview of how you can achieve fantastic results with Aperty:
Essentials
This panel covers all the basic editing tools such as exposure, contrast, and white balance. Adjust your image's overall tone using the tone curve tool. For night portraits, slightly reducing the temperature in your white balance can give your photos a cooler and more fitting night-time feel.
Retouch
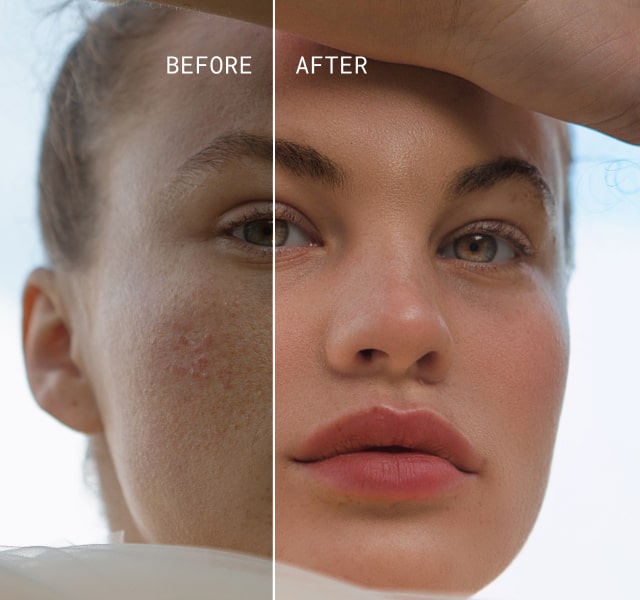
This is where Aperty truly shines. Typically time-consuming tasks, like skin smoothing and blemish removal, can be accomplished with just a single click. Aperty’s Face Skin tool helps you achieve smooth, blemish-free skin while maintaining natural skin textures. Additionally, you can highlight facial features such as eyes and lips without the tedious process of manually brushing; Aperty recognises these features automatically.
Make Up
Didn’t have a makeup artist on your shoot? No worries! Aperty allows you to apply makeup digitally, resulting in subtle and realistic enhancements. You can also enhance existing makeup, making it more pronounced if needed.
Reshape
You can adjust the body shape or even subtly reposition facial features. Aperty automatically detects these areas, saving you from complex and lengthy manual editing tasks, delivering excellent and natural-looking results.
Creative
This section is ideal for experimenting with your images and gives you all the tools needed to achieve exactly the look you have in mind. A particularly useful feature here is the Light Source setting, which lets you simulate studio lighting and adjust hues realistically. It's perfect for adding that final, eye-catching touch to your portraits. You can creatively use this feature to introduce striking colours or enhance lighting effects similar to those seen in cinematic photography, making your images truly stand out. Adjusting the positioning and intensity of your simulated lights can elevate your portraits, producing vibrant results that instantly grab attention.
With these tools and tips, you're ready to elevate your night portrait photography and create stunning images that truly stand out.
The Bottom Line
Night portrait photography opens up a whole new world of possibilities, allowing you to capture moods and aesthetics that simply aren't achievable during the day. Creative use of artificial light sources can introduce vibrant colours, striking tones, and eye-catching effects. To achieve the best results, position your subject around available light sources to minimise noise and keep your images crisp, while embracing colourful hues cast onto your subject’s skin.
Get imaginative with your posing and take inspiration from your favourite cinematic scenes to create a dramatic atmosphere. Finally, using a tool like Aperty can help you achieve these cinematic looks more easily by offering powerful retouching, creative, and essential editing tools to quickly produce professional-quality images.
Above all, enjoy experimenting in your next night photography session; you're sure to capture something memorable!
