How To Edit Hair In Photo: Tips And Techniques That Work
June 19, 2025

One of the biggest challenges in portrait editing is hair. It often requires more attention than beginners realise, from flyaway strands that disrupt the image to colour and shine that need adjusting. Many photographers end up spending far too long trying to get it just right.
That’s where Aperty comes in. This portrait-focused editing software speeds up your workflow so you can spend less time behind the screen and more time behind the camera. In this article, we’ll show you how to use Aperty to get clean, natural-looking results when editing hair, quickly and effectively.
Your Vision, Perfected – Bring Your Portraits to Life with AI
Try Aperty NowPreparing Your Image
 Firstly, let’s import your image into Aperty to get it ready for editing:
Open up Aperty and head to the Projects folder at the top of the screen.
Click on Create Project and give it a name.
Finally, drag and drop your image from your files into the Drag and Drop window and you’re ready to edit.
The Editing Process
Before working on the hair of your subject, you will need to do a base edit. This is so you can assess how to blend the hair appropriately with the rest of your image. Thankfully, this is another area where Aperty shines, allowing you to achieve professional results quickly.
Develop
Inside the Develop panel on the right side of the screen, you can adjust your image’s exposure, contrast, and colour balance. It contains all of the essential tools you need to get your image looking just right.
Pro tip: Colour balance and grading should be done at the very end, even after working on the hair, as early adjustments can affect skin tones and other details later on.
Retouch
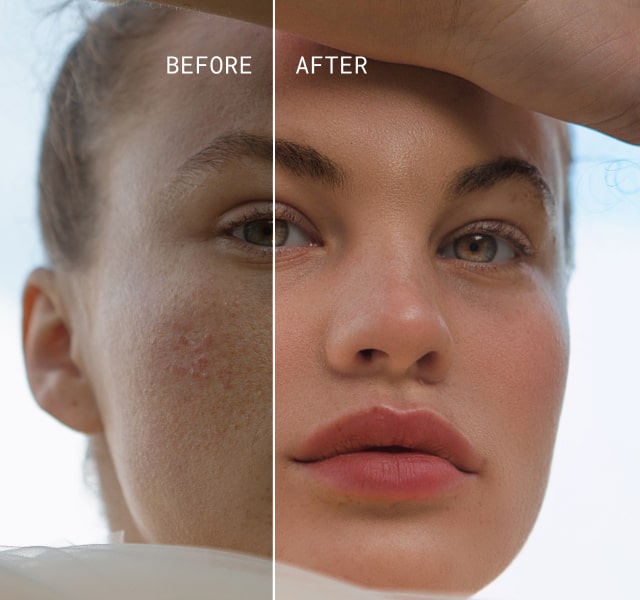
Skin editing used to take up a lot of time, but Aperty simplifies it. In the Retouch panel, you’ll find tools such as skin smoothing, blemish removal, and makeup enhancements. These tools are designed to preserve natural textures, avoiding that over-processed look that many beginners struggle with.
Reshape
This panel has everything you need to subtly reshape facial features or the body. You can even reposition elements, all while keeping results natural-looking.
Creative
This panel is especially useful if you encountered lighting issues during your shoot. You can simulate light sources, add film grain, vignettes, and even apply LUTs for stylised looks.
Once your base edit is complete, you can move on to treating the hair. It will now be easier to achieve the right look and blend the hair seamlessly into the rest of the image.
Less Time Editing, More Time Creating
Try Aperty NowEditing Hair
 The process of editing hair can be broken down into four key steps:
- Stray Hairs
- Texture
- Definition
- Tones
Whether or not you had a hair stylist on set, stray hairs are always going to be an issue, and it’s the job of the editor to remove them for a clean and well-presented look. The other element to control is texture. Hair can be a great way to introduce more detail into your image and shouldn’t be overlooked. We then want to make the hair stand out by enhancing its shine and contrast, ensuring it fits naturally with the rest of the image. Finally, you can treat the colour tones to either make them more pronounced or fix any discolouration caused by lighting.
Your Vision, Perfected – Bring Your Portraits to Life with AI
Try Aperty NowStep 1. Dealing with Stray Hairs
We begin by cleaning up the hair so that it’s looking just right before working with texture and tone.
Erase Tool
Go to the Erase Tool at the top of the screen and start brushing away any stray hairs you want to remove. Aperty’s AI technology will analyse the image and replace the hair with the surrounding background.
For more delicate hairs, adjust the brush size using the slider on the right-hand side of the screen or press the left bracket ([) key on your keyboard.
Clone Tool
Another approach is to use the Clone Tool. This lets you clone parts of the background over the stray hair, offering a manual alternative to the Erase Tool.
Step 2. Treating Texture
Next, we’re going to improve the hair’s texture by creating a mask. Click the masking button (second icon on the right-side menu), then select Mask Person(s).
You’ll now have a new mask labelled Person 1. Click the three dots next to it to open the menu, hover over the Subtract submenu, and select the Brush Tool. Brush over the subject’s face and body to remove them from the mask. You can adjust the brush’s size, strength and softness for more control. A soft brush will usually be fine here, especially if you’re working around fringes or hairlines, as the changes won’t be too intense.
With the mask ready, go to the Essentials panel. Now any adjustments you make will only apply to the hair.
Use Sharpen, Details or Structure to work on the hair’s texture. Avoid over-sharpening, as this can make the hair look harsh. On the other hand, overly softening it can make it look fake. The Structure tool offers a good balance, using AI to adjust sharpening and clarity in a content-aware way that adapts to the subject.
Step 3. Enhancing Definition
Still using the hair mask and Essential tools, it’s time to make the hair stand out more. The Structure tool may have already helped add clarity, but you can now build on this.
To bring out shine, use the Highlights or Whites sliders in the Light section. You can also use the Curves tool for more control.
For precise highlight work, select the Dodge Tool at the top of the screen (next to the Erase Tool) and brush over the glossy areas of the hair. Adjust the Strength slider for natural results.
To deepen darker tones, try adjusting the Contrast or Blacks sliders in the Light section, or work with the Curves tool to fine-tune your contrast.
Step 4. Controlling Tones
The final step is treating the tones of the hair to bring out colour while keeping it balanced within the image. Over-saturating the hair may draw unwanted attention to it, which we want to avoid.
With the hair mask still active, go to Essential Tools and open the Color and HSL sections.
If the hair looks discoloured due to lighting, use the HSL panel to adjust hues. The Hue Shift slider allows for broad changes, but for more realistic results, tweak each colour channel individually.
Once satisfied with the hue, go to the Color tab. Depending on your image, you can use Saturation or Vibrance. Since you’ll likely be applying an overall colour grade later, it’s best to add just a touch of vibrance here. Aim to make the hair look healthy and natural, without making it stand out more than necessary.
No Limits, Just Creativity – Pick a Plan & Start Editing
See PlansFinal Steps
 It’s time to finish your image by making any final tweaks and applying some style through your colour grading.
You can return to the colour tools we mentioned earlier, or head to the Creative panel and apply a LUT to help stylise your shot.
For professional results, all colours should feel balanced and in harmony. If any tones are becoming too dominant or distracting, adjust their presence using the HSL sliders. The key is to maintain vibrancy without over-processing. This final step can make or break your image, so take your time and make careful adjustments.
The Bottom Line
 Dealing with hair in your photo need not be the daunting task it once was. Aperty can help you achieve professional-looking results, even if you didn’t have a hair stylist on set. Start with your base edit for a smoother workflow, then move on to the hair. The four steps are:
- Stray Hairs – Clean up with the Erase or Clone tool.
- Texture – Soften or enhance with the Structure tool.
- Definition – Bring out highlights and depth.
- Tones – Ensure the hair looks natural, not dull or overly vibrant.
Follow these steps and you’ll be able to achieve flawless hair that fits seamlessly into your final image. Have fun!
