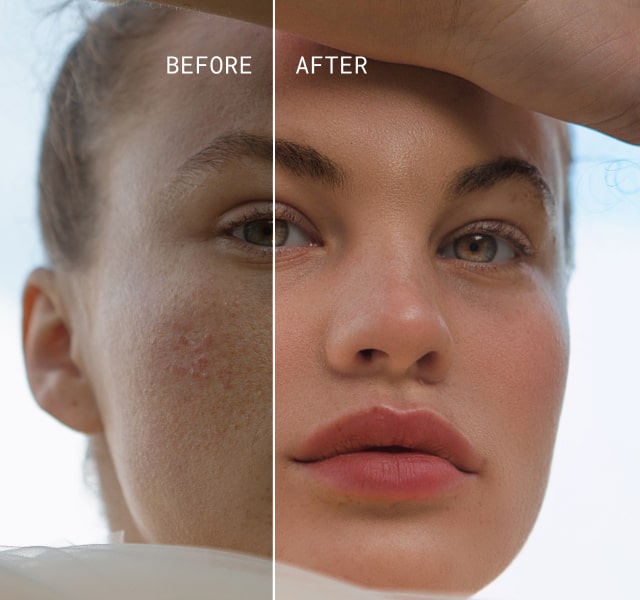
How To Fix Facial Asymmetry In Photos Without Anyone Noticing
September 29, 2025
Fixing a face not symmetrical in photos doesn’t have to be a headache anymore.
With Photoshop, what once felt like slow, fiddly photo reshaping is now quick and precise.The trick is subtlety: go too far, and edits look fake; keep them gentle, and you smooth out only the little details that distract from the portrait. The goal isn’t perfect symmetry — that usually looks unnatural — but balance, so your photo feels polished and flattering. Let’s dive in and see how you can achieve it.
Evaluate the Asymmetry
I know you’re here because you’re wondering, “How to make my face more symmetrical?” Before we get into the actual fixes, it’s worth taking a step back. Asymmetry can come from different sources, and each requires a slightly different approach.
Here’s a quick breakdown to help you spot what’s going on in your photo:
Light: Strong directional light can create contrasts that leave shadows, making features look uneven. If that shadow falls over the eye, for example, it may appear much smaller than the other. A nose may also look crooked depending on how the shadows fall across it. If this is the case, you can try using dodge and burn tools before moving on to fixing asymmetry with other methods.
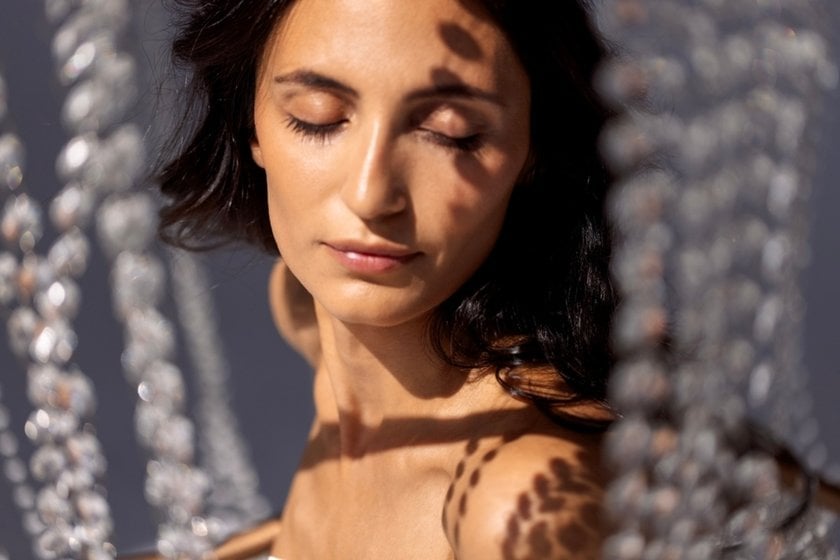
Pose: Sometimes the angle of the face can obscure features or make them appear uneven. If the head is tilted or turned, one side of the face may appear higher than the other, making the eyes, ears, or jawline look more pronounced.

Natural Facial Asymmetry: Of course, it may simply be how the face naturally looks. No face is perfectly symmetrical, with eyes, eyebrow height, lip shape, and jawline all being slightly different. The subject may also have a past injury, such as a broken nose, which can cause crookedness.

Remember, we only want to work on facial symmetry if there is a distracting difference, especially when caused by posing or lighting, and therefore not reflecting how the model actually looks. Now that you’ve identified the cause of the asymmetry, it’s time to begin working on it.
You may also like: How To Edit Hair In Photo: Tips And Techniques That Work
Less Time Editing, More Time Creating
Try Aperty NowHow to Make Your Face Look Symmetrical: Step by Step
Step 1: Prepare your Image in Photoshop
 Open your photo in Photoshop and duplicate the layer (Ctrl/Cmd + J) so you can always revert to the original. If the asymmetry is caused by uneven lighting, try correcting it with the Dodge and Burn tools first. If that doesn’t solve it, move on to structural adjustments.
Step 2: Correct Facial Asymmetry with Liquify
 The Liquify tool is the main fix for facial asymmetry. It automatically detects facial features, making what used to be a tedious process much faster and easier.
Go to Filter > Liquify. A new window opens with curved guides around the face, showing you that Photoshop has identified the main features. In the right-hand panel, you’ll find sliders for precise adjustments:
Eyes: Liquify has two separate menus for each eye, so you can adjust them independently. You can modify size, height, width, tilt, and distance between the eyes. Eye tilt and height are particularly useful if the asymmetry comes from the pose.
Mouth: The main correction here is balancing the upper and lower lips. You can increase or decrease lip size, adjust the width, or refine the smile. Keep in mind these changes affect the mouth as a whole, not each side separately.
Nose: Only two sliders are available — height and width. They’re simple but effective for straightening or refining shape.
Face Shape: This menu lets you adjust jawline, face width, chin height, and forehead proportions. While it doesn’t directly fix asymmetry, it helps create a more flattering, harmonious look overall.
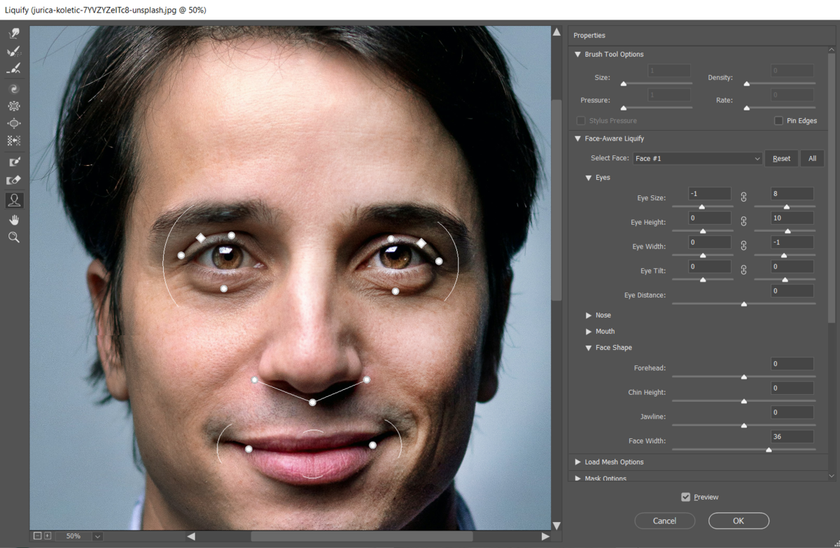
On the left side of the Liquify panel, you’ll also find manual tools. If you need to refine specific areas such as the nose or jawline, try the Forward Warp Tool (W). Adjust brush size with the bracket keys and gently push or drag areas of the face into better alignment.
Step 3: Alternative Methods (if Liquify isn’t enough)
 If Liquify doesn’t fully fix the issue, try these alternatives:
Puppet Warp (Edit > Puppet Warp) – Place pins to anchor stable areas (cheeks, forehead, lips) and then add pins along the feature you want to correct. Gently drag the pins to realign without distorting the rest of the face. Great for noses, mouths, or jawlines.
Transform > Warp – A quicker but less precise option. Use a 5x5 grid to push or pull areas into better symmetry. It offers less control than Puppet Warp but works for subtle tweaks.
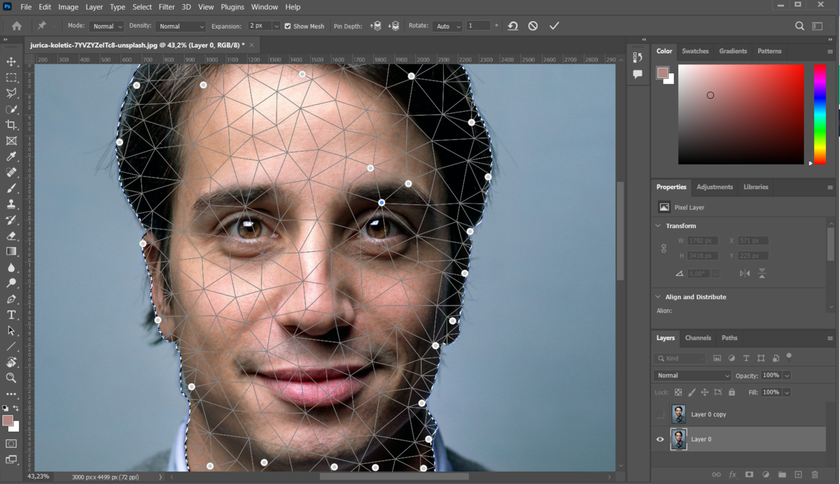
For most edits, Liquify’s AI face recognition is enough. Still, Puppet Warp is a reliable backup for finer, localized corrections.
Step 4: Final Touches and Refinements
 For professional portraits, consider adding Aperty, a Photoshop plugin by Skylum that uses AI to speed up retouching while keeping results natural.
Inside Photoshop, go to Filter > Skylum Software > Aperty. From here, you can apply one-click edits or fine-tune details:
Retouching: Remove blemishes, smooth skin, and balance tones while preserving natural texture.
Make-up Tools: Add blush, eyeliner, or contouring for a polished look.
Reshape Tools: Adjust facial features or body proportions with strength controls to keep edits realistic.
Creative Tools: Add or reposition light sources, adjust hue, and enhance atmosphere.
Essential Adjustments: Exposure, contrast, clarity, and tone curve for finishing touches.
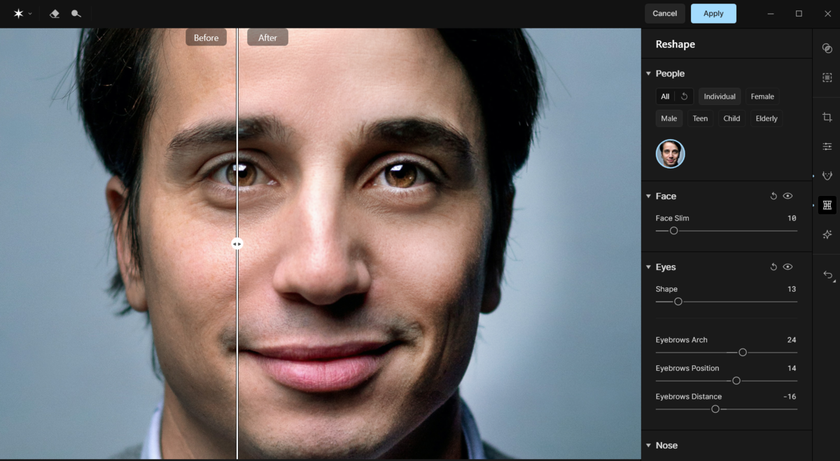
With Aperty, you can retouch portraits faster and more efficiently, letting Photoshop handle the heavy lifting while you focus on creativity and style.
AI Editing at the Speed of Inspiration
Try Aperty NowThe Bottom Line
Every face tells its own story, and a little asymmetry is part of that story. But sometimes a shadow, a pose, or a small detail pulls too much attention. That’s where Photoshop comes in. With Liquify, you can gently guide features back into balance. With Puppet Warp, you can fine-tune without breaking the natural flow. And with Aperty, you can polish skin, light, and mood so the portrait feels effortless. The result isn’t a perfect mask, but a photograph that captures your subject at their best — natural, confident, and true.


