How to Fix Green Skin Tone in a Photo: A Step-by-Step Guide
March 26, 2025

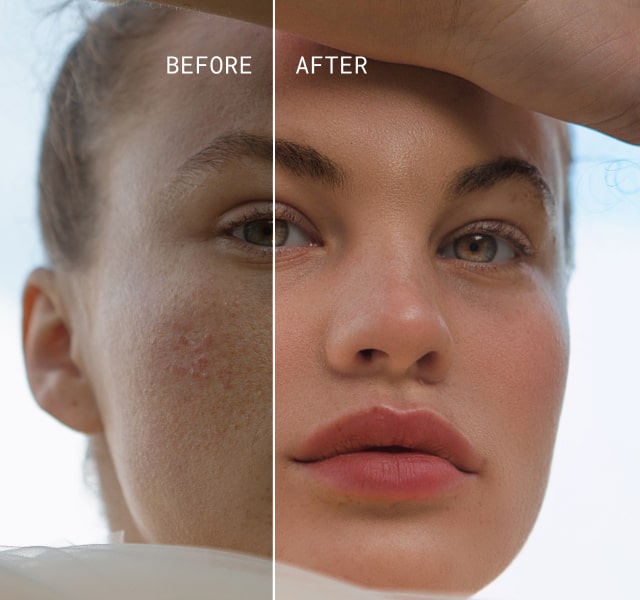
It is widely accepted that green skin tones are undesirable in portrait photography. Our brains perceive these tones as unnatural or even associate them with illness, so it is a look you and your clients will want to avoid. They can arise for various reasons and sometimes leave photographers tearing their hair out when editing.
In this article, we will show you how to prevent this problem from the start and explain how to fix it easily in Aperty, a portrait-focused editing software. Let’s get started!
Common Causes of Green Skin Tones
 Let us start by examining what causes green skin tones so you have the best chance of avoiding this issue in the first place:
1. Lighting Conditions
One key factor is your choice of lighting setup. If you are shooting indoors under fluorescent lighting, green skin tones are almost inevitable. This is because fluorescent lights contain red, green, and blue colour bands, with a particularly strong green component.
As a result, many photographers dislike using this light source, as it can cast green hues onto the subject. Look for alternative or natural light sources to minimise this effect.
2. White Balance
Check the white balance settings on your camera. If it is set to auto, it may be shifting your subject’s skin tones towards green. Manually adjust the white balance to match your environment. Other camera settings, such as picture profiles or in-camera filters, might also play a role, so review these carefully to pinpoint the cause.
3. Environment
The location of your shoot can also contribute to green skin tones. Surfaces like grass or green walls reflect their colour onto the skin. Grass is a common culprit: while photographing in a lush field can look beautiful, it often leaves an undesirable colour cast on the subject. In such cases, green skin tones might be unavoidable, so let us explore how to correct them.
How to Remove Green Skin Tones with Aperty
When trying to remove green tones from your model’s skin, you generally cannot simply desaturate green hues, as this would affect the rest of the image. Imagine a photo taken in a lush green field; a global desaturation would strip colour from the grass, plants and other foliage. Instead, we need to focus on your subject’s skin specifically, which is exactly what we will do in Aperty.
Step 1. Import Your Photo
 At the top of the screen, you will see a folder icon for creating a new project. Once you have named your project, drag and drop your images into Aperty or double-click the import window to locate your image in your computer’s files.
Step 2. Select Your Subject Using Masking
 The second icon down in the menu bar on the right is the masking tool. Click the ‘person’ option, and Aperty will detect and select your subject automatically. You can now apply any adjustments you like using a range of tools, without affecting the rest of the image.
Step 3. Adjust Skin Tones
Once your ‘person’ mask is active, there are several ways to address green tones without applying changes to the entire photo inside the Essentials section:
White Balance Tint: Adjust the tint slider from green towards magenta until the skin appears natural.

Remove Colour Cast: This tool may slightly alter your subject’s appearance but is useful when the green hues are strong, such as those caused by fluorescent lighting.

HSL (Hue, Saturation and Luminance): Carefully tweak the hue of green and yellow tones to find a natural balance. You may desaturate green, but if the cast is intense, you risk losing all colour in the subject’s face.

Also, there is a specific way to tackle green hues in the Retouch tab: Face Skin tool. Under it, you will find Face Skin Colour Correction, which identifies unnatural tones in the subject’s face and works to preserve natural skin tones.
Step 4. Retouch and Finalize the Look
 Use Retouch tools to tidy up your subject’s appearance by removing blemishes, smoothing skin and enhancing features such as the eye edit. Aperty’s AI technology speeds up this process so you need not paint over every area manually.
The Bottom Line
There is no need to despair when you review your latest shoot and see alien-green hues affecting your subject’s skin. Nor do you have to spend hours studying complicated methods to resolve the problem. Aperty, powered by advanced AI, can tackle the issue with just a few clicks while preserving any green tones present in the rest of the shot.
Its automatic mask detection tool locates and selects your subject, allowing you to focus adjustments solely on their skin. With various tools at your disposal, you can maintain natural skin tones and perfect the rest of the image for a cohesive, beautiful result.


