How To Get Sharp Portraits: Perfect Your Photography Skills
January 09, 2026

If you’ve ever wondered how to get sharp portraits that actually hold up at 100 percent zoom, this guide breaks it down clearly.
Getting a portrait that feels truly crisp and detailed is something most photographers chase for years. It’s not just about finding nice light or a clean background. Nailing how to get tack sharp portraits comes down to controlling focus, making smart choices behind the camera, and finishing the image with careful edits after the shoot. That final polish is where Aperty helps most, because it can enhance detail and texture without making skin look crunchy or fake.
When the capture is solid, this editor turns “almost sharp” into “client-ready” in a few careful adjustments. You’ll find practical steps and real examples aimed at improving your portrait photography and editing workflow.
Why Sharp Portraits Matter
 When you scroll through a set of portraits that really hit, it’s rarely “lucky.” The images feel alive because the important details are clean, the eyes are crisp, a few strands of hair hold their shape, fabric texture shows up, and tiny expressions don’t get lost. Getting that kind of result comes from deliberate decisions while shooting, and a careful finish when you edit. Aperty streamlines the latter with powerful tools that help photographers refine details naturally and efficiently.
 A great portrait doesn’t just look technically correct; it feels alive. The sharpness should feel purposeful. That’s where understanding camera settings for sharp portraits and post-processing tools come together to elevate the final image.
Less Time Editing, More Time Creating
Try Aperty NowGet Focus Right in-Camera First
 Before ever opening Aperty, focus decisions during the shoot lay the groundwork for clarity. Even the best editing software can’t fully rescue an image that’s fundamentally out of focus. Here are critical techniques seasoned photographers use.
Focus On The Nearest Eye First
If someone wants a fast way to boost sharpness, they should start by focusing on the nearest eye. Viewers check the eyes right away, and sharp eyes make the entire portrait feel more finished. Eye autofocus on most modern cameras can grab the eye for you, which really helps when the pace is quick.
Understand Depth of Field
That soft, dreamy background is hard to resist, so many people shoot wide open by default. The catch is that at f/1.4 or f/1.8, the depth of field can get so thin that only a small strip of the face is truly sharp. When it makes sense, stopping down a bit helps keep both eyes and more facial detail in focus without sacrificing the gentle blur. The goal is understanding how the exposure triangle affects sharpness, not only exposure.
Freeze Movement
Movement steals detail fast. A tiny head turn, or a shaky hand, is enough to make the eyes look soft. That’s why shutter speed matters so much; it has to match what’s happening in the frame. If you’ve ever looked at a “great” shot and realized it’s slightly blurry, this is usually why. It’s also worth reading about motion blur portrait techniques, because blur can be a mistake or a style choice.
Use Back-Button Focus For Control
When the person shifts a little, laughs, or leans in, half-press autofocus can suddenly grab the nose, eyelashes, or even the background. Back-button focus lets the photographer lock focus on the nearest eye, then fire a few frames without the camera refocusing every time. It’s a simple switch that keeps sharp shots consistent during real, lively moments.
Enhance Portrait Sharpness with Aperty in Post
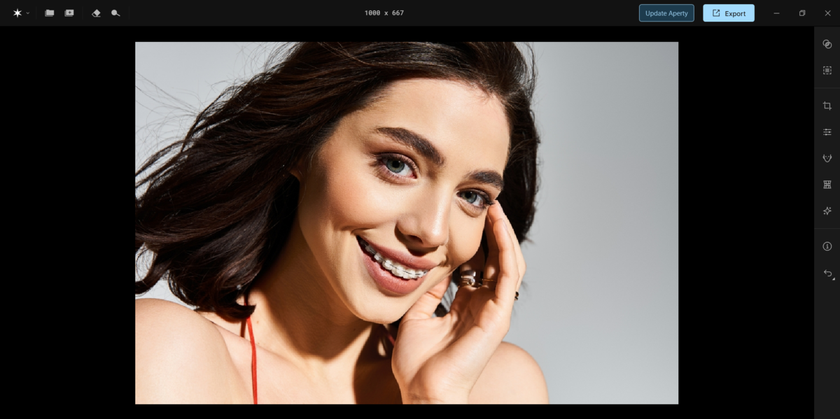
Once you’ve captured images with intentional focus and exposure, Aperty steps in to refine and enhance. This portrait editing software uses AI to help you improve clarity and preserve natural textures. Aperty is designed specifically for portrait photographers who want efficient and high-quality post-processing results without heavy manual edits.
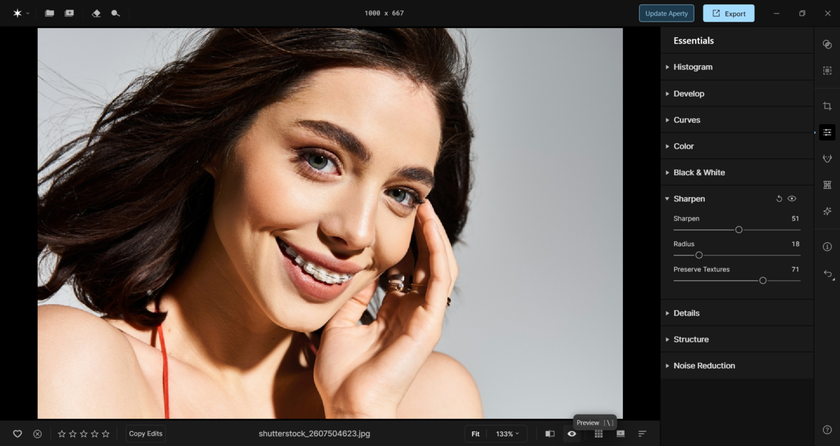
Sharpen Tool
 Aperty’s sharpening tool is not just a “turn it up and hope” slider. It reads the photo first, then lets you add crispness where it matters without turning edges into crunchy outlines. It’s especially useful for bringing back tiny details in eyes, hair, and fabric, while keeping the portrait looking real. It’s the finishing touch for images that are already sharp, but still feel a little flat.
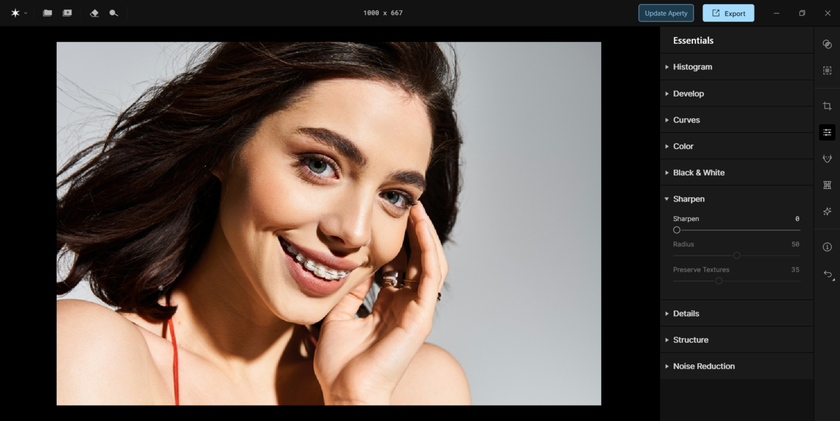
How It Works
Import your portrait into Aperty.
Open Essentials → Sharpen Tool.
Raise the Sharpen slider to add crisp detail.
Adjust Radius to control how wide the sharpening spreads.
Use Preserve Textures to keep skin from looking harsh.
Click the Eye icon to check Before/After to make sure it still looks natural.
This tool helps photographers refine shots that already embody how to take tack sharp portraits by accentuating the details that matter most.
Structure Tool
 Along with sharpening, Aperty also has a Structure tool. It brings out mid-tone detail, like cheekbones and fabric weave, without chewing up smoother skin. That gentle control adds depth and a more three-dimensional feel, especially in high-resolution files where tiny texture is part of the subject’s personality.
Eye Editor
 A portrait often feels sharp the moment the eyes look crisp. Aperty’s eye editor makes small, clean tweaks like lifting the iris brightness, adding a touch of depth, and reducing mild redness, so the gaze stands out without looking “edited.” Since eyes usually lead the viewer’s attention, these refinements fit naturally into sharp portrait photography.
Practical Workflow Example: Studio Headshots
 Let’s look at a real-world workflow where Aperty and good shooting technique combine:
Set camera for focus: Use single-point autofocus on your subject’s eye and a modest aperture (like f/4) to ensure enough depth of field for the face.
Adjust lighting: Soft lighting from a reflector or softbox creates even exposure without harsh shadows. Uneven lighting can confuse autofocus and reduce detail sharpness.
Shoot and review: After capturing a series of shots, zoom in on the playback screen and check if the key facial features are tack sharp. If not, adjust focus or lighting before continuing.
Edit in Aperty: Import the chosen shots into Aperty. Use the Sharpen and Structure tools to bring out details. Make subtle eye adjustments to emphasize the expression. If needed, use batch processing to apply consistent edits across similar images.
The result is more than “technically sharp.” It’s a portrait that looks alive, with small details that make people linger.
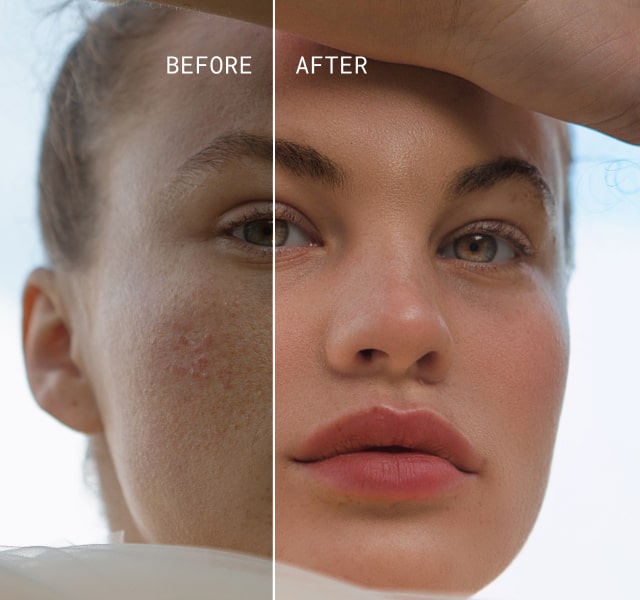
Learning Through Comparison
 Retouching is part of the learning curve. After editing in Aperty, flip between the before and after and really look. Check if the eyes feel crisper, if hair and fabric have more bite, and whether your in-camera focusing made the edit faster instead of harder.
Photographers who review their results like this start spotting patterns fast. They see what settings keep details clean and what habits cause softness. After a few shoots, those choices become automatic, and sharp portraits start happening on purpose.
AI Editing at the Speed of Inspiration
Try Aperty NowTips for Consistent Portrait Sharpness
 Here are a few tips seasoned photographers follow:
Review your focus points after every series of shots.
Use a tripod when possible for studio setups.
Avoid extreme aperture values unless the creative effect demands it.
Keep ISO low to preserve detail without unwanted noise.
Shoot a quick burst of 2–3 frames per pose to beat micro-movements.
These practices, combined with thoughtful editing, make consistently sharp and compelling portrait photography an achievable goal.
Quick Recap
Sharp portraits aren’t something you “save” for editing later. They start with locking focus, picking settings that match the scene, and finishing with a simple workflow you can repeat every time. Aperty handles that last step by adding detail and polish without pushing portraits into that overdone look. When it works, it’s obvious: crisp detail, natural skin, and a photo that feels like a real moment. Build the habit, and suddenly you’re shooting faster while editing with way more confidence.