How To Remove Dark Circle Under Eyes From Portrait Shots
August 15, 2025

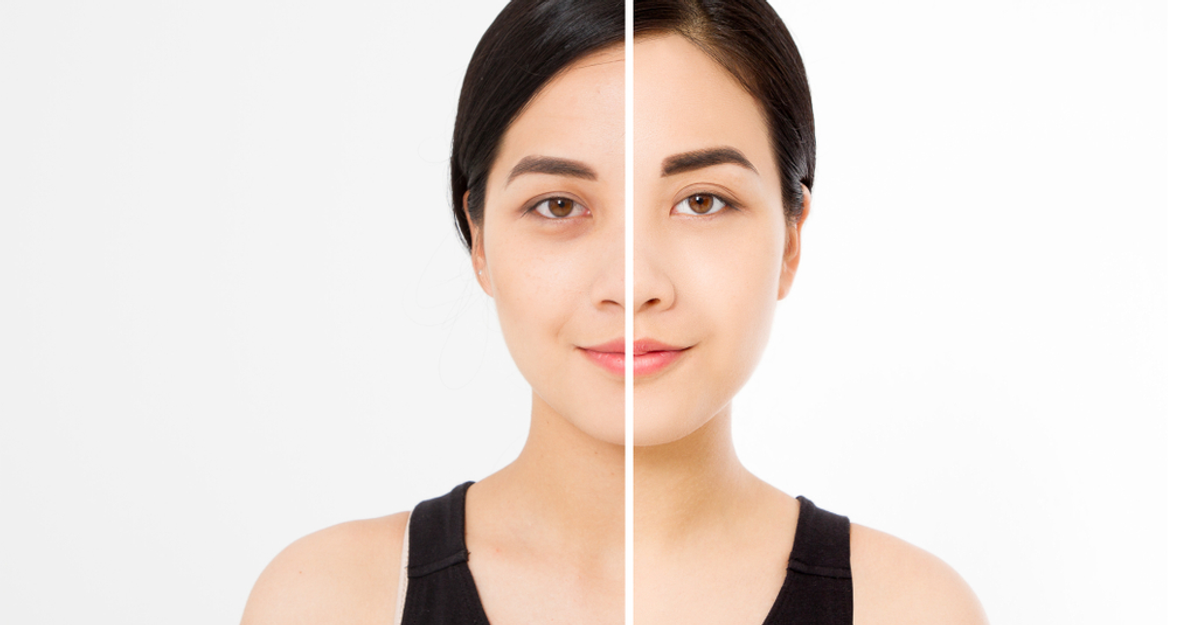
It’s an issue most portrait photographers will be aware of and have likely dealt with during the editing process: dark circles under the eyes.
Unfortunately, it’s not as simple as covering them with make-up, especially for those with deep-set eyes. These dark circles can make the model look tired and less vibrant, even if they had a full night’s sleep before the shoot.
That’s why it’s up to the photographer to address them either during the shoot or later in post-production. In this article, we’re going to guide you through both, so your model looks fantastic.
You may also like: A Guide To Eyes Retouching For Natural-Looking Photos
Why Dark Circles Appear in Photos
 Before understanding how to remove black under the eyes, let’s take a look at why dark circles appear under your models’ eyes and how to deal with them during the shoot.
1. Facial Structure
Some people have naturally deep-set eyes which create the illusion of dark circles due to shadowing. These shadows look less flattering in photos but they can be managed.
How to fix: Review your lighting setup and try to avoid casting shadows under the eyes by creating a more even light.
2. Poor Lighting
Even those without deep-set eyes may show dark circles if the lighting is poorly balanced or directed.
How to fix: Be mindful of your light direction and positioning. Techniques like butterfly lighting or clamshell lighting can help create flattering shadows. Using a fill light or reflector beneath the face can also brighten under the eyes.
3. Under-eye Pigmentation
Some people naturally have darker pigmentation under their eyes, often due to genetics or thinner skin, even if they’re well-rested.
How to fix: The lighting approaches above may help, but in these cases, makeup can also be a useful tool to even out the tones around the under-eye area.
4. Tiredness
Of course, dark circles can simply be the result of lack of sleep. A tired appearance can build as the shoot progresses, so regular breaks and a relaxed atmosphere are important.
How to fix: Ensure your model is well-rested before the shoot, and give them breaks during longer sessions to keep them energised and looking their best.
While these are useful on-set techniques to manage dark circles, they aren’t always foolproof. That’s where post-processing comes in. Let’s take a look at how to remove or reduce dark circles using Aperty.
Create More, Edit Less – Let AI Handle the Details
Try Aperty NowHow to Get Rid of Dark Circles in Aperty: Step-by-step
If you aren’t familiar with Aperty, it is a portrait-focused software designed to give you professional results in no time at all. Gone are the days of manually drawing paths to make your edits. Aperty uses AI technology to detect the areas you want to change automatically. So let’s see how to reduce dark circles with ease.
Step 1: Import Image
Start by importing your image into Aperty. Click the project folder icon at the top of the screen and select Create Project. Give your project a name and drag your image into the project window.

Step 2: Initial Image Adjustments
Before working on the model’s skin, it helps to get your image into a good base state. You can do this inside the Essentials menu (the fourth icon down on the right side). Make adjustments to exposure, contrast and overall balance until you’re happy with how the image looks. Once that’s done, you’re ready to fix the dark circles.

Step 3: Fixing Dark Circles
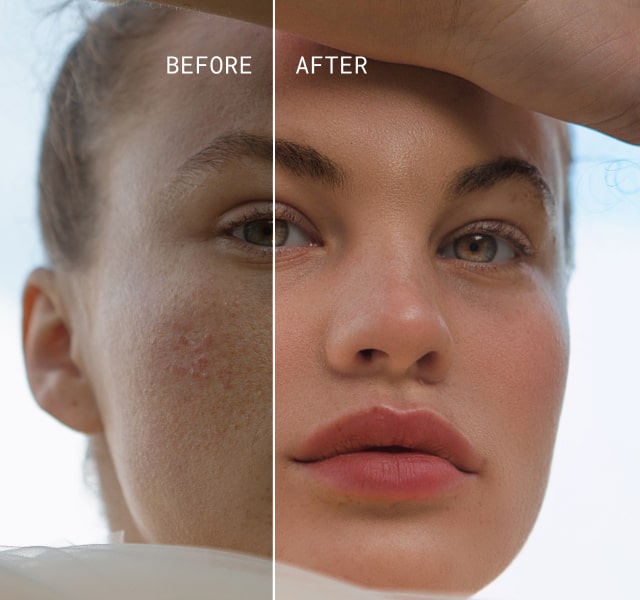
The good news is that Aperty can fix dark circles with just one click. Head over to the Retouch menu (fifth on the right side) and look for the Face Skin tools. Here, you’ll find the Dark Circles Removal tool. Aperty automatically detects the area under the eyes, and all you need to do is adjust the strength to your liking. Make sure the blending looks natural and matches the surrounding skin tones.

Step 4: Surrounding Skin Tones
If you find the skin looks uneven after removing dark circles, you can refine it further. Still inside the Face Skin section, use the Face Skin Colour Correction tool. This will help create more even skin tones across the face, resulting in a more flattering and cohesive look.
For an even better result, I also recommend using the Blemish Remover. It will help eliminate any small imperfections, such as spots or redness, giving the skin a smoother and more polished appearance.

Alternative Way to Remove Dark Circles from a Photo
If you prefer a more hands-on method, that’s still possible. At the top of the screen, you’ll find the Dodge and Burn tools. Select Dodge and gently brush over the dark areas under the eyes to lift the shadows. Adjust the strength to ensure it blends seamlessly with the rest of the face.

Editing Tips to Keep It Natural
 A common beginner mistake is going too far with retouching tools. This can result in an over-processed look, where the model no longer appears natural, ultimately weakening the overall quality of the photo.
Aperty’s retouching tools are designed to correct imperfections while preserving natural skin texture, which is exactly what professionals aim for when editing portrait photography.
Here are a few additional tips to help you achieve high-quality results:
Maintaining Depth
It’s normal for a slight shadow to appear under the eyes, and in fact, this can be beneficial. That bit of depth adds contour and prevents the face from looking flat. Keep a subtle touch of it under the eye and across the face to preserve a more natural and flattering appearance.
Zoom Out Regularly
It’s easy to become overly focused on a small area of the image, which can lead to edits that no longer match the rest of the photo. To avoid this, zoom out frequently to check how your changes fit within the whole frame. It also helps to take short breaks and come back with fresh eyes to ensure everything is balanced.
Add Contrast if Needed
If your model’s face looks a little flat after your edits, there are ways to bring back depth. You can create a mask and brush over the face using the Contrast, Curve or Structure tools to enhance shape without affecting other parts of the image.
Another great option is the Contouring tool. With it, you can add contouring make-up in post to accentuate your model’s bone structure, producing lifelike and natural results. You can also apply the Wrinkle Remover if needed, helping to smooth fine lines for a more refreshed appearance.
Batch Application for Consistency
When editing a set of portraits, consistency is key. Aperty’s Batch Editing can save you a lot of time while ensuring uniform results. At the bottom of the screen, click the Filmstrip icon to view your images.
Once you're happy with your adjustments, press Copy Edits, then select the remaining photos and press Paste Edits. Aperty will automatically detect the same facial areas and apply your changes across all selected images. It’s fast, easy, and highly effective.
AI Editing at the Speed of Inspiration
Try Aperty NowThe Bottom Line
Dark circles under your model’s eyes can be a real issue, often making them look tired or withdrawn. It’s something every portrait photographer wants to avoid. If you’re unable to correct it during the shoot, for example with lighting, Aperty has the tools to help. This portrait-focused editing software can automatically detect and brighten the under-eye area, giving your model a more refreshed and vibrant appearance.
That said, keeping a small amount of shadow under the eyes can actually be a good thing. It helps maintain natural depth and facial contours, which are important for a flattering result. If the face looks too flat after editing, bring back structure using the Contrast, Curve or Contouring tools inside Aperty.
With these techniques, you’ll have a revitalised, professional-looking portrait that holds attention for all the right reasons.

