When To Shoot With Manual ISO And When With Auto: Portrait Cases
July 18, 2025

You know the feeling. You’re standing in front of your model, the light is perfect, and suddenly, a cloud. Then the sun. Then another cloud. All within two minutes. Moments like that make you wish your camera could just think for you, especially when it comes to ISO.
I used to think Auto ISO was for people who didn’t want to bother with settings, and Manual ISO was only for pros chasing perfect exposure. But the more I shoot, the more I understand—both modes have their place.
In this article, I’ll share how I decide which mode to use: is Auto ISO good and when I take full manual control. I’ll also show you how I bring everything together in post using Aperty.
Alright, enough intro, let’s get into it. We’ve got plenty of practical theory ahead today!
Less Time Editing, More Time Creating
Try Aperty NowWhat Is ISO and Why It Matters in Portrait Photography
 ISO is a setting that controls your camera sensor’s sensitivity to light. The higher the ISO, the brighter your image will be, but at the cost of increased digital noise.
In portrait photography, that matters a lot. High ISO can mess with skin tones, reduce detail, and introduce unpleasant grain that’s tough to remove even in post-processing.
So the big question is: when should you let the camera adjust ISO automatically, and when is it better to take control yourself?
You may also like: Studio Lighting Setups: Photography Cheat Sheet
Benefits of Auto ISO for Portraits
 Auto ISO is all about flexibility and speed, especially when the light keeps changing, and you don’t have time to adjust settings every 30 seconds.
Saves time and nerves: You don’t have to dive into your settings every time a cloud covers the sun or your subject moves into shade. The camera handles ISO, and you stay focused on composition, emotion, and the moment.
Handles shifting light conditions: Shooting portraits while the background keeps changing from bright to dark? Auto ISO “follows the action” is great for outdoor shoots, events, or travel photography.
You keep control where it matters most: In manual mode with Auto ISO, you get to lock in your aperture and shutter speed for depth of field and motion; the camera just manages ISO. And most modern sensors handle higher ISO levels surprisingly well.
Works in all shooting modes: Auto ISO adapts to aperture priority, shutter priority, and even full manual. That means you can shoot at f/2.0 for dreamy bokeh or 1/500 to freeze motion, without stressing about exposure.
Better a noisy shot than no shot: Sometimes ISO 3200 is worth it, especially when your model laughs or moves unexpectedly, and you need to capture that moment instead of fiddling with your dials.
Example: You’re shooting golden hour portraits, and the light keeps shifting. Auto ISO helps you stay in the moment and not miss the shot, even as the light changes mid-frame.
When Manual ISO Is the Better Choice
 Should I use Auto ISO for all my shoots? Not quite. Auto ISO gives you speed but manual ISO gives you full control. And sometimes, that’s exactly what a portrait needs.
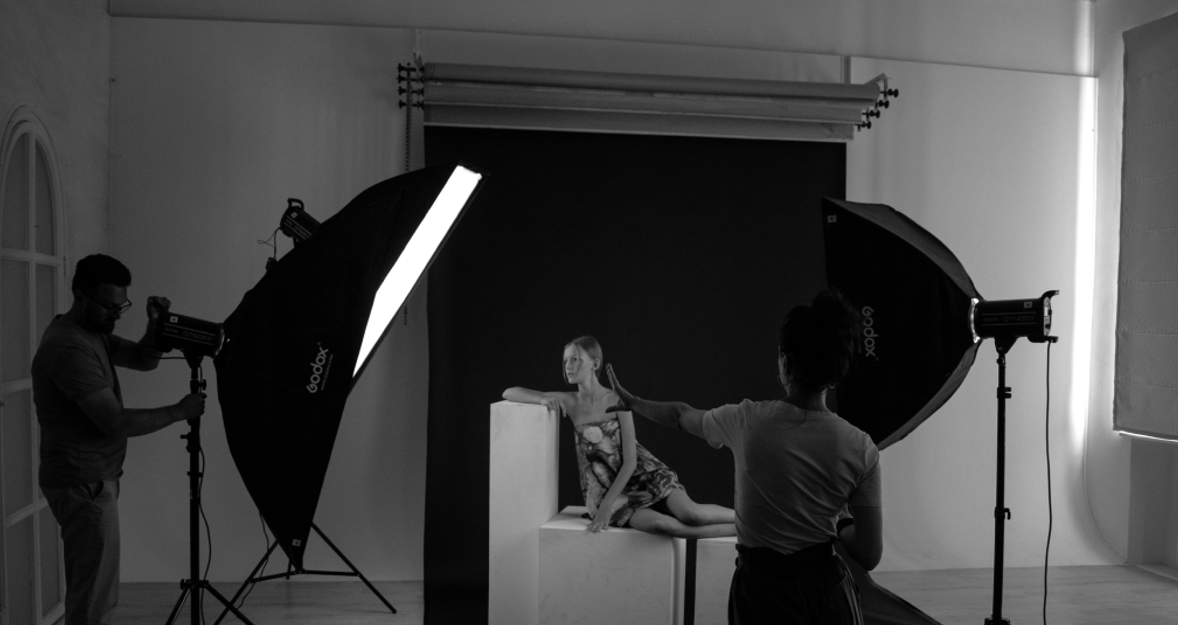
Total control in consistent lighting: In the studio or on cloudy days, manual ISO lets you lock in all three parts of the exposure triangle: shutter speed, aperture, and ISO. No surprises, no unexpected noise.
Access to ultra-low ISO values: Some cameras let you shoot at ISO 50 or below, which Auto ISO typically won’t use. That’s helpful when you want slower shutter speeds in bright light or the cleanest possible image.
Avoid unexpected noise: Auto ISO can push sensitivity higher than you’d like, especially in dark conditions. Manual ISO helps you keep the grain in check, essential for high-end prints or commercial work.
Set it and forget it: When lighting doesn’t change, manual ISO lets you forget the technical stuff and just focus on your subject: their expression, the framing, the vibe.
Fewer surprises: Shooting a model in front of a rapidly changing background? Auto ISO might get confused. With manual, you avoid weird overexposures or underexposures.
Manual ISO does demand attention. If your subject moves from shadow into sunlight, you’ll need to react quickly. Otherwise, you risk blowing out your highlights or losing the shot entirely.
Example: You’re shooting during golden hour. The light changes gradually, then this is a perfect time for manual ISO. Keep your ISO low for image quality, and manage your shutter and aperture to catch those magical moments without grain.
No Limits, Just Creativity – Pick a Plan & Start Editing
See PlansHow Aperty Helps After the Shoot: My Step-by-Step Workflow
You can shoot in Manual ISO for full control. Or go with Auto ISO to catch the moment. Either way once the shoot is over, there’s always one big question: How do you make the whole series look consistent, atmospheric, and professional, even if your ISO jumped from 100 to 1600, and the light kept changing every five minutes?
Here’s how I use Aperty, an outdoor portraits editor, to pull everything together after the shoot:
Step 0: Import & Evaluate
Before editing, I run through the series in Aperty to check what I’m dealing with: ISO variation, lighting shifts, white balance inconsistencies. This gives me a feel for what needs fixing and where I want to push the style.
Step 1: Reduce Noise Without Losing Skin Texture
Even if Auto ISO pushed you to 3200 in a fast-paced moment, Aperty’s noise reduction smooths things out without ruining detail. Skin stays natural, texture stays real. Perfect for print or client work.
Step 2: Match the Colors Across the Series
The light may have changed, white balance may have drifted, but you still want a unified look. Aperty lets you color-balance a whole batch quickly, so your set feels like a single story, not random frames stitched together.
Step 3: Fix the Lighting, Even After the Fact
Did your light turn out too flat or contrasty? No worries. With Light Control, you can re-shape the light on your subject’s face, add depth, sculpt highlights, and create realistic light effects that feel natural, not artificial.
Step 4: Keep Your Signature Editing Style
Whether you use custom presets or Aperty’s built-in AI looks, you can preserve your editing vibe, even when the lighting situation was chaotic. The software adapts without killing the mood you worked so hard to capture.
Step 5: Retouch with Precision
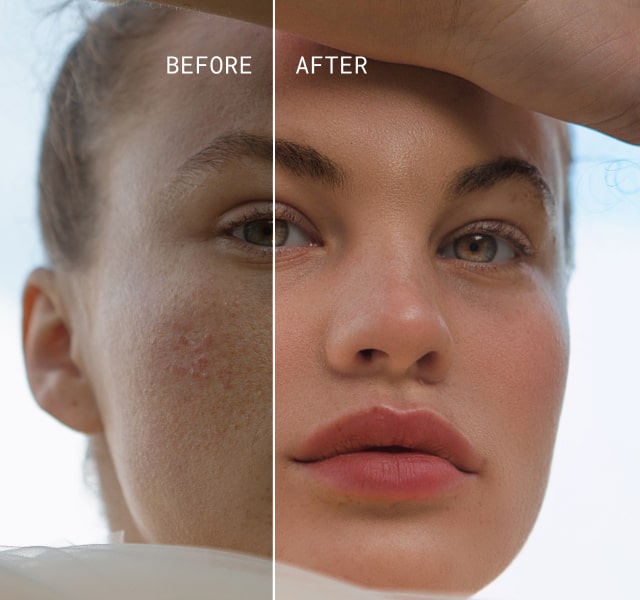
Aperty’s AI retouching smooths skin, reduces blemishes, enhances eyes and tones, but without the plastic look. This is especially useful when shooting in tough light where every skin imperfection gets exaggerated.
5 Practical ISO Tips: Auto or Manual?

1. Capturing Emotion in the Moment? → Go Auto ISO
Events, street portraits, kids, real laughs, quick movements—when the moment matters more than the settings, Auto ISO helps you react fast and focus on the composition, not the dials.
2. Need Consistency Across Your Series? → Go Manual ISO
In the studio, during golden hour, or in any controlled lighting—Manual ISO keeps your exposure steady from shot to shot, making post-processing way easier and more predictable.
3. Worried About Noise? → Set a Max ISO Limit
If you’re using Auto ISO, set a ceiling (like ISO 1600–3200). That way, your camera can still adapt to changing light, but without introducing too much grain, especially important for prints or commercial work.
4. Always Check Exposure Before the Shoot
Planning to shoot in shifting light? Take a quick test shot with your target ISO setting. It’ll save you from blown highlights or muddy shadows later, and save time in post.
5. Want Creamy Bokeh? → Use Auto ISO + Aperture Priority
Shooting wide open at f/1.8 or f/2.0? Use Auto ISO with aperture priority mode. You get full control over depth of field, and your camera handles the ISO automatically, perfect for soft, dreamy backgrounds even in unpredictable light.
Create More, Edit Less – Let AI Handle the Details
Try Aperty NowFinal Thoughts: Auto or Manual ISO?
 There’s no universal answer.
Auto ISO works best when speed and spontaneity are your priorities.
Manual ISO is ideal when you need full control and consistency.
It all comes down to your style and the situation. Don’t be afraid to test both options in different scenarios; the more you adapt, the more confident you’ll get with your exposure.
Make Any Shot Look Professionally Lit
Try Studio LightFAQ
Does Auto ISO affect portrait quality?
Yes, if the camera pushes ISO too high, it can introduce noise, especially in the shadows. But modern cameras handle ISO 1600–3200 pretty well, and with the right post-processing (for example, in Aperty), you can easily clean up the noise without losing detail.
When should you avoid Auto ISO?
If you're shooting in a studio or want consistent exposure across a series, Manual ISO gives you full control. Also, when lighting is stable, there’s no real need for Auto, locking in the lowest possible ISO will give you the cleanest results.
How do you reduce noise when using Auto ISO?
Set a max ISO limit in your camera settings (say, ISO 1600). Make sure you're exposing properly, lifting shadows in underexposed images adds noise. Use AI noise reduction tools like Aperty to smooth things out without ruining skin texture.
What’s better for weddings or street portraits?
Auto ISO is great for fast-paced moments and changing light, like capturing real emotion on the go. Manual ISO works best for posed portraits where everything is under control. Ideal approach? Use Auto ISO for dynamic shots, Manual for steady setups.
How do you fix color and noise after shooting with mixed ISO?
That’s where modern AI tools come in. In Aperty, you can:
Remove noise while preserving skin detail.
Balance color and exposure across the set.
Keep your editing style consistent, even if conditions were all over the place.
