Pet + Owner Portrait Making: Tips for Connection and Tone
November 03, 2025

Pet photos are those special shots you want to keep forever, to look back on fondly and remember your furry best friend and the moments you shared. No matter what kind of pet you have, all animals share one thing in common: they can be challenging to work with. I remember my old dog Max, a golden Labrador, and I could not keep that boy still for a moment. If you have a turtle, on the other hand, this will not be as much of an issue, although you might struggle to coax it out of its shell.
All that being said, what truly makes a pet photo special, while being just as challenging as keeping them still, is capturing the connection between owner and pet. That is exactly what we are going to explore today, helping you capture that bond and make your photo truly unique and memorable. And of course, we are going to help you with the editing process too, so your shots can be worthy of hanging up on the wall for years to come. So, let’s get started.
Before You Start: Prep for a Smooth Session
 Let’s have a look at what you are going to need for these special photos. If you’re doing a self portrait then something I would definitely recommend is both a tripod and a shutter remote.
While the tripod is the obvious choice, the remote shutter might not be so, why not just use a timer? Well, let’s go back to the initial challenge of working with pets, they can be unpredictable and full of energy. So imagine the frustration of having to hit that 10 second timer only for your cat to lose interest or your dog to sneeze. Therefore you can set up in the frame with your pet and have the remote to fire off the shutter when things are just right.
I would also make sure that they are in the right mood for the type of photo you want to shoot. So not right before meal time or when they just want to sleep. You want them fully engaged and alert so you can capture the shared interactions.
Now let’s start looking at some ideas for shoots that you can do, no matter what pet you are working with.
Less Time Editing, More Time Creating
Try Aperty NowFind the Perfect Spot: Location Ideas That Tell a Story
Where is the pet’s favourite place? It could be a garden, out on a trail or even in front of a fireplace. Basing your shoot around their favourite location will showcase a bit of their personality, tell a story and remind you or the owner of when the pet was at their happiest.
If you are shooting indoors, just ensure that you have enough light. If the pet is quite calm and can stay still long enough, you may be afforded the opportunity to use a slightly longer shutter time. With my old dog Max, I’d need a shutter speed equivalent to that of shooting F1 cars, therefore needing a great deal of light. Outdoor locations can be best, shooting in natural light which should be ample enough for crisp shots. Which leads me on to my next point.
Chasing the Light: How to Nail the Golden Hour Glow
If you are working with a pet that can venture outside, I would highly recommend shooting during golden hour. If you are not familiar with the term, it refers to the time of day when the sun is beginning to set. It delivers this beautiful quality of golden light that does wonders for your photos. Not only will skin be flattered by such light, but that golden light will evoke a sense of nostalgia and amplify the fond memories when the photo is looked back on.
If you are working with an indoor pet you could shoot by a large window and still capture the same aesthetic in your shots. Just be wary that golden hour provides less light than that of the midday sun, so ensure you use settings that will allow in enough light while keeping you and the pet crisp and sharp.
Capturing Real Connection: Emotions, Eye Contact & Play
Now for the big challenge: how can you authentically capture the connection between the owner and the pet? Getting them in the right mood is half the battle, so let’s take a look.
Firstly, the biggest piece of advice I can give is to consider where you or the owner are relative to the pet. If you want to show the bond and connection they have, it doesn’t make sense for the owner to be standing above the pet looking down, as it gives off the wrong impression. Whereas if the owner is at eye level with the pet, it shows a more loving and mutual relationship between them. So, shoot from a low angle and have the owner crouch down to their pet’s level. From here, eye contact is key. Having the owner and pet both looking into each other’s eyes is one of the biggest indicators of the bond they share. I would want to have both faces framed equally in the image, on the same level and looking at each other.
That isn’t to say that they must always be on the same level. Even if the owner is a little above the pet, have it be in such a way that it looks less like a master and obedient pet, and more fun and playful. For example, perhaps they are hugging their pet, holding them against their chest as they look down at them lovingly while the pet looks up at their owner.
Which leads me on to my next point: interactions. What do the owner and their pet love doing together? It could be playtime, belly rubs, or going out on a walk. Choose something the pet loves, or something that completely relaxes and destresses the owner the moment they interact with their pet that way. As a result , you are immortalising the fond memories the owner and the pet share, and it feels authentic to the relationship. Ultimately, it comes down to two factors for your image: you need to showcase the connection between the owner and pet, and consider the overall mood of the photo. From playful to loving and caring, think about what emotions you want to display when the image is looked back on.
 Simple Edits to Bring Out Emotion
For any photo involving people, I use Aperty. This portrait-dedicated editing software does a great deal of the heavy lifting and leaves a flattering impression on any model or person in the shot.
Here’s a quick overview of the editing software and why it is certainly worth considering for your work.
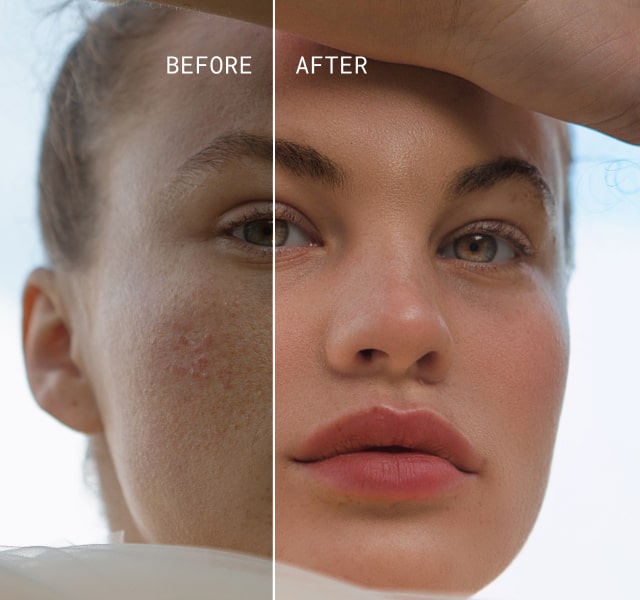
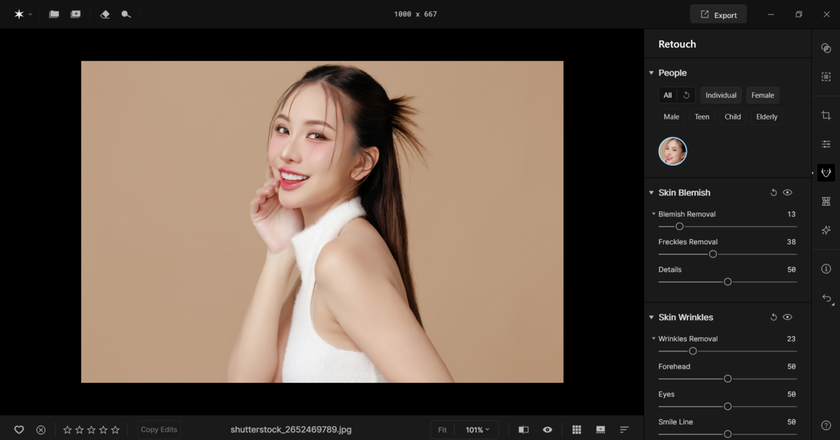
Retouching. Aperty removes blemishes, smooths skin, and balances tones with a single click, all while preserving natural texture for polished, realistic results.
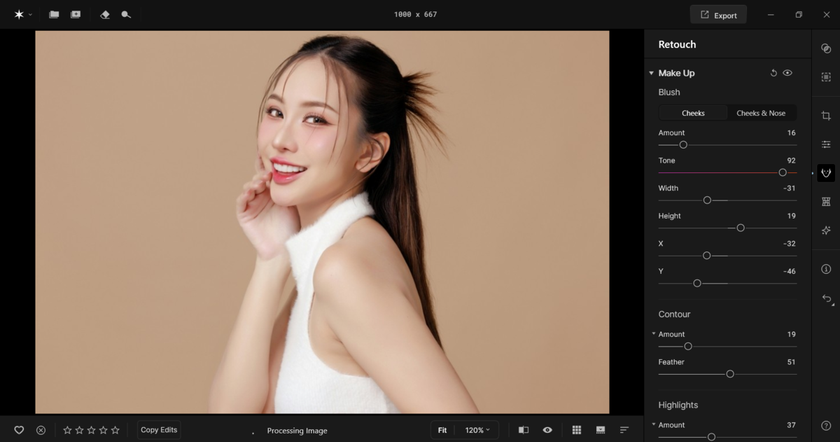
Make-up Application. You can apply or enhance make-up in post-production using customisable tools for blusher, eyeliner, and contouring to achieve natural, flattering looks.
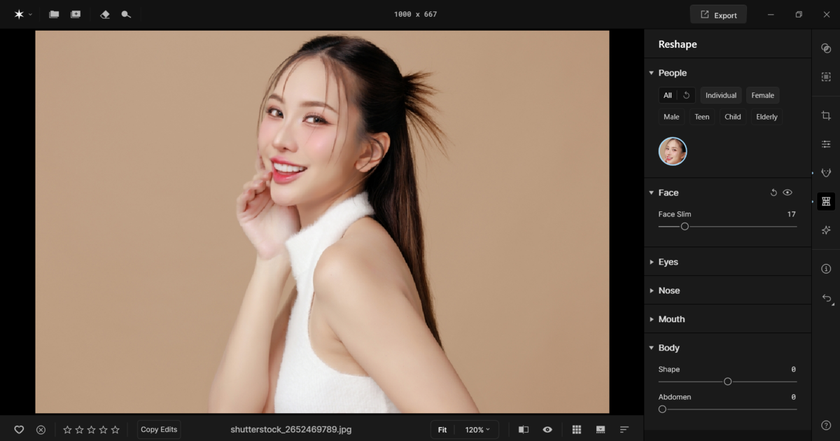
Resizing and Repositioning. The Reshape tools let you adjust body and facial features with precision, ensuring enhancements remain subtle and believable.
Creative Tools. Add or reposition light and change its colour directly within Aperty to craft the perfect mood and atmosphere for your portraits.
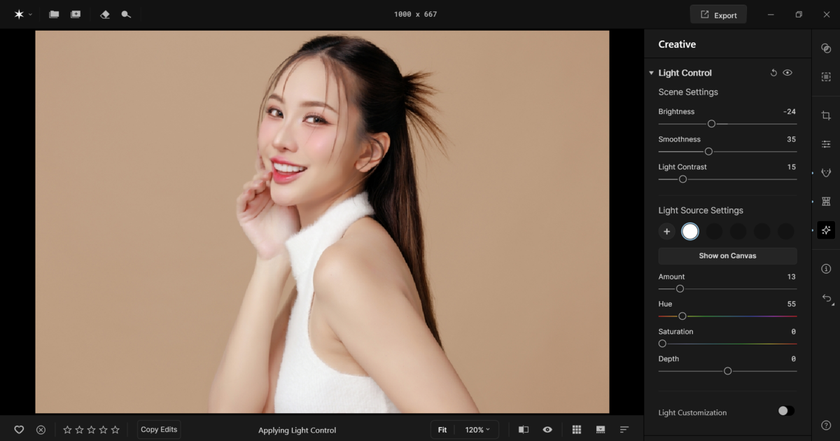
Essential Tools. Fine-tune exposure, contrast, and clarity with ease. Use Structure to enhance detail and Tone Curve for precise manual adjustments.
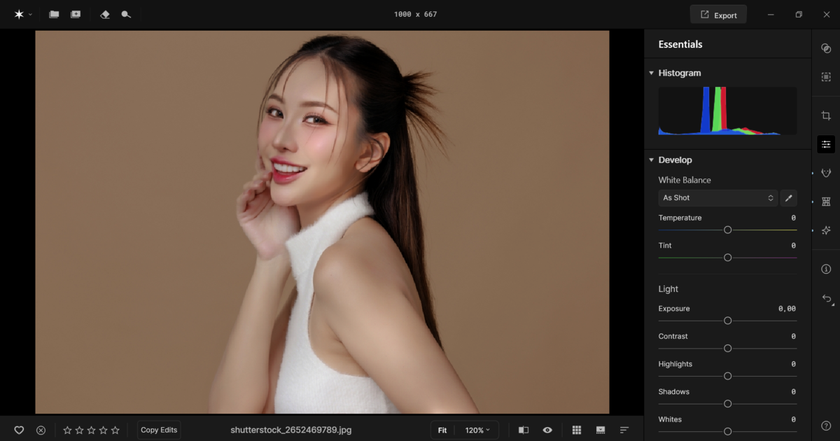
To summarise all of this, you’re getting professional results in no time at all, doing justice to your treasured memories.
AI Editing at the Speed of Inspiration
Try Aperty NowQuick Edit Walkthrough (Step-by-Step)
Let’s do a quick run-through of how I would edit portraits featuring you and your pet.
Step 1: Basic Adjustments
After importing the image, I start by adjusting the exposure and contrast, followed by a few small tweaks with the tone curve to get the balance just right.
Then I move on to details. This tool can be especially effective for pets as it separates details into small, medium, and large levels, allowing you to bring out the texture of your pet’s fur.
Lastly, I use the Structure tool to add more clarity and enhance textures further.
Step 2: Retouching
Next, I make adjustments to the skin and face of any people in the shot. This includes skin smoothing and blemish removal, all done with one click while avoiding an over-processed look.
Eyes, lips, and teeth can all be enhanced too, making them brighter and more striking. If needed, make-up can be enhanced or applied with realistic results.
Step 3: Colour Grade
The final step is enhancing the mood and style of your photo through colour grading. For meaningful shots like these, where the goal is to evoke warmth and fond memories, I tend to emphasise warm tones.
You can do this using the temperature tool, adjusting the white balance towards golden tones. If this negatively affects skin tones, use the masking tool, which automatically detects people in your shot and limits adjustments to the background, keeping your subjects intact.
You can then fine-tune hues, saturation, and luminance using the Colour tool. This is always my last step to ensure everything feels cohesive and balanced.
If you have multiple photos to edit, Aperty’s batch editing feature will save you a great deal of time. Simply copy your adjustments, and Aperty will intelligently apply them across your photos.
Step 4: Export
And that’s it, you’re all done! You can now export your photos and share them online, save them to a folder, or prepare them for printing.
Takeaway: Capture Love, Not Just a Pose
Photos with pets are taken as keepsakes and treasured memories. The way you approach the shoot should revolve around capturing the bond between the pet and their owner, showing a genuine connection that is immediately clear when viewing the image.
When planning your shoot, focus on the mood you want to convey, whether it is playful or a reflection of the love shared between the owner and the pet.
Above all, have fun with shoots like these. They are not only special for the owner but for the photographer too.


