Natural Light Portrait Photography: Beyond Golden Hour
July 11, 2025

When you think of portrait photography using natural light, golden hour probably comes to mind first, and for good reason. It casts a beautiful, warm glow that flatters your subject and makes everything look stunning. But golden hour isn’t the only time worth shooting. Throughout the day, different types of light can still offer excellent opportunities for natural light portraits.
In this article, we’ll guide you through our top 10 natural light portrait photography techniques. We’ll also include editing advice along the way, using Aperty, the portrait-dedicated editing software that lets you handle editing, retouching and creative work all in one place.
You may also like: Studio Lighting Setups: Photography Cheat Sheet
Less Time Editing, More Time Creating
Try Aperty NowTop 10 Natural Light Portrait Photography Tips
1. Taming Harsh Midday Sun
 Let’s start with one of the trickiest scenarios in natural light photography: how to take natural light portraits in the harsh midday sun. Bright overhead light can highlight blemishes and wash out colorsnot ideal for portraits or fashion shoots. Still, with a few smart tricks, you can make it work and even use those strong contrasts to your advantage.
You can get fantastic contrast by playing with harsh light and shade. Let the light partially cover your model to create an interesting balance. Shadows can act as a soft, diffused light source that retains color saturation and avoids drawing attention to skin imperfections.
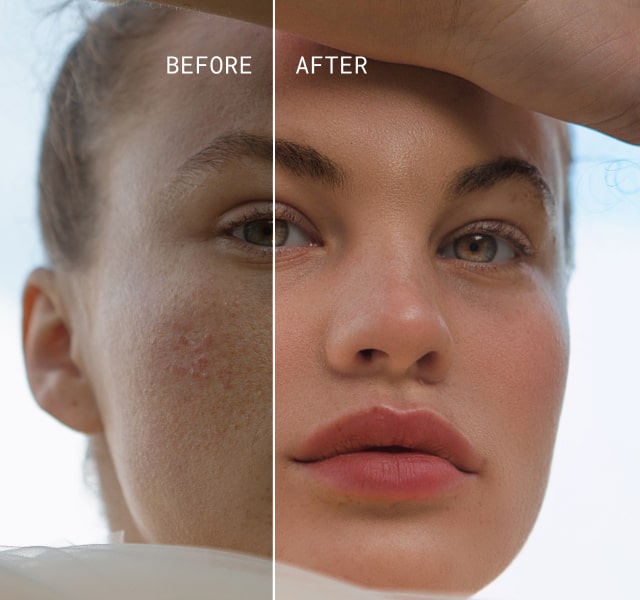
Embrace the light—Aperty Editing Tip: If you want to create bright and vibrant shots, go ahead and have fun with it. It’s becoming more of a trend recently, and the way to combat blemishes is to use Aperty’s skin tools. These standout features hide blemishes, smooth skin and reduce wrinkles while still preserving natural skin texture, avoiding that over-processed look.
2. Overcast? Perfect Portrait Weather
 The opposite of a bright sunny day is shooting portraits in natural light under a dreary overcast sky. But should that mean we stay indoors? Absolutely not. Overcast skies actually offer super flattering light. Think of the midday sun as a bare studio bulb, and the clouds as a giant softbox. Studio photographers use softboxes for a reasonthey create even, soft light that smooths out skin and tones down blemishes. Plus, colors stay rich and saturated, so grey days are definitely worth taking advantage of.
Make it sharper—Aperty Editing Tip: Sometimes, overcast light may feel a little flat. To enhance the look, try the Structure or Details tool in Aperty. Structure uses AI to add sharpness and clarity intelligently, while Details gives more refined control by separating small, medium and large elements.
No Limits, Just Creativity – Pick a Plan & Start Editing
See Plans3. Shoot During Blue Hour for Moody Vibes
 Did you know that there’s a period after golden hour called blue hour? It’s a short period of twilight just after the sun sets or before it rises, when the sky takes on a rich, deep blue. It’s perfect for moody portraits. You can also incorporate artificial lighting, either from your own equipment or ambient city lights, for dramatic effects.
Illuminate the face—Aperty Editing Tip: If your subject’s face looks too dark, try Aperty’s Face Light tool. It will automatically detect the face and brighten it naturally. You can also enhance the eyes and other features individually.
4. Bounce That Light—Even With a Pizza Box
 One simple way to improve lighting in shade or on overcast days is to use reflectors. You don’t need fancy gear either. A cheap reflector board, or even a large piece of white card, can do the job. You can also bounce light off nearby walls or surfaces for soft fill light.
Let there be light—Aperty Editing Tip: Aperty’s Light Control tool lets you add custom lighting effects for photos, giving you full control over intensity, hue, and position. It’s perfect for enhancing natural light in post, and it’s genuinely fun to play with — definitely worth a try!
5. Backlighting = Dreamy Halos
 It’s time to position the sun behind your subject for an interesting halo like effect. This can be a great way to create dreamy portraits. One issue here may be lens flare, but some photographers actually enjoy this effect for an added element of interest.
Masking subjects—Aperty Editing Tip: Editing such images can be very tricky, as increasing the brightness of your subject will make your backdrop overexposed. Thankfully, Aperty has a one-click solution. Head to the masking tool, where you can simply select the Mask Person(s) tool. This tool will automatically detect your subject and allow you to make edits and changes to them without impacting the background.
6. Capture Action in Crisp Daylight
 Abundant daylight allows for fast shutter speeds. This is especially helpful when shooting action portraits, such as sports or dance. Use burst mode and a quick shutter to capture movement clearly.
Saving time with batch editing—Aperty Editing Tip: Shooting in burst mode creates a lot of files. Aperty’s Batch Editing tool allows you to copy adjustments from one photo and apply them across your set. It even recognises individual subjects, applying the correct changes to the relevant person, saving you even more time.
Create More, Edit Less – Let AI Handle the Details
Try Aperty Now7. Use Light Angles Like a Pro
 We don’t have the luxury of being able to position the sun the same way we would a studio light, but we can move our subject. Try using natural light at angles that mimic classic lighting styles, such as Rembrandt lighting or split lighting. Experiment with different angles for different moods.
Contrasting—Aperty Editing Tip: To add depth to your image you can make the contrast more apparent by deepening shadows. We don’t want to boost the highlights too much as we may lose texture in the skin. But by creating a mask for your subject and boosting the contrast or deepening shadows and black tones, you will be able to get a more striking look.
8. Don’t Forget the Background
 It’s easy to get caught up focusing on the lighting on your subject and forget about the background. Be aware of your white balance and exposure, and ensure your background supports rather than distracts from your image.
Background focus—Aperty Editing Tip: Aperty has a Background tool that automatically isolates your backdrop, allowing you to tweak colour temperature, brightness and depth separately from your subject. It’s a powerful tool that gives you full control of how to present your background so give it a try!
9. Get Dreamy Daytime Bokeh
 Bokeh isn’t just for night shots. You can get lovely daytime bokeh by shooting wide open (around f/2.8) with sunlight peeking through trees or foliage behind your subject. The highlights will appear as soft, dreamy circles of light.
Post-bokeh—Aperty Editing Tip: You can add bokeh to your shot in post-production with just a simple click inside of Aperty. Head over to the Creative Tools and you will find the Portrait Bokeh tool which will then proceed to apply this effect around your subject with you having full control over the strength of application.
10. Keep It Chill with Lifestyle Shots
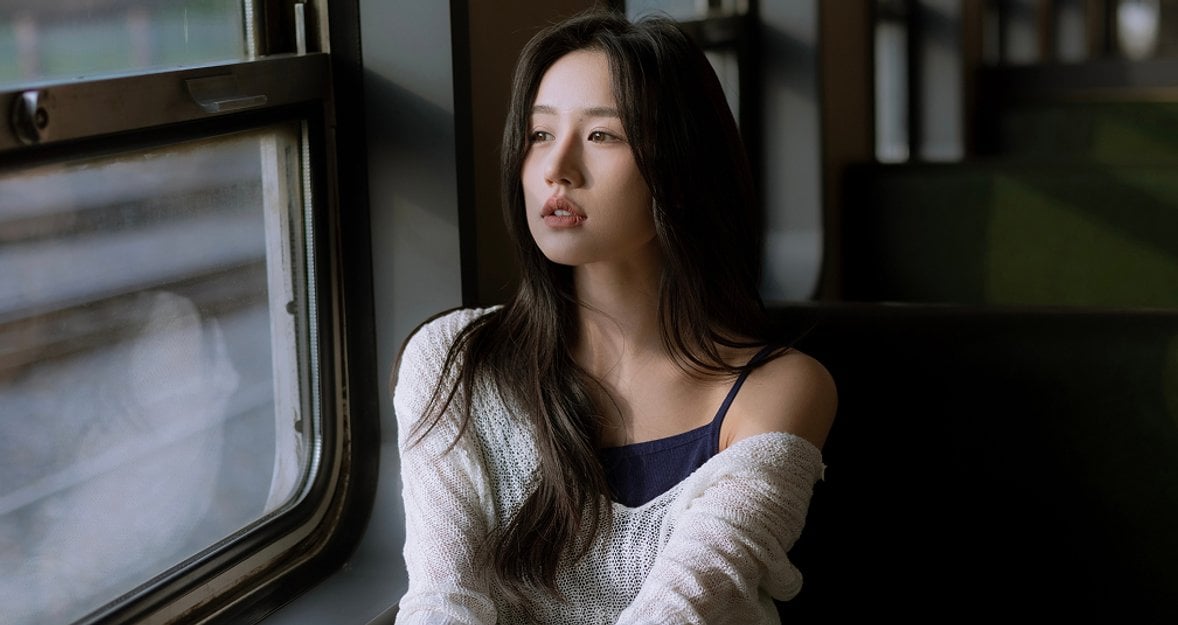
 Natural light during the day is consistent and abundant, making it perfect for relaxed, lifestyle portraiture. Head indoors to shoot by coffee shop windows, take a walk through busy streets or narrow alleys, or even shoot relaxing at the park. There are so many locations thanks to the natural light.
Quick turnarounds—Aperty Editing Tip: If you want to get your work exported quickly so you can have more time to do shoots, Aperty has you covered. Not only do you have the batch editing and the one-click retouch work, but you also have LUTs and Presets at your disposal so you can have stylish lifestyle shots in no time at all. Browse through the presets and LUTs that come with Aperty and see which ones match your vibes.
Less Time Editing, More Time Creating
Try Aperty NowThe Bottom Line
Golden hour might be the favorite, but it’s definitely not the only option. Once you learn how to shoot portraits in natural light, you’ll see that every time of day—from soft overcast mornings to harsh midday sun—has its own creative potential. You just need to know how to work with it.
After the shoot, toss your photos into Aperty for a quick edit. With batch tools and one-click fixes like skin smoothing and blemish removal, your workflow gets way easier. That means less time editing, more time shooting. Have fun out there!
