Aperty is here, and this all-new editing tool tailored for portrait photographers offers the quickest path to perfect portraits. With cutting-edge AI technology, Aperty enables superb retouching results in no time at all. The application focuses on delivering natural-looking results, ensuring skin textures remain intact while removing blemishes, avoiding that over-edited look.

There’s also a strong emphasis on speed, allowing photographers to spend less time retouching and more time capturing stunning photos. With batch editing capabilities, you can copy and paste your edits across an entire shoot, saving valuable time. Furthermore, Aperty is entirely on-device, meaning no cloud servers are involved. This ensures full control over your privacy and data. 

Whether you’re just starting with portrait photography or are an experienced professional, Aperty offers a powerful, streamlined editing experience that enhances your workflow. In this article, we’ll walk you through the application and highlight some key features that make Aperty stand out from the crowd.

Key Features of Aperty

  • Natural-Looking Results: Achieve sharp precision with a focus on authentic textures while keeping your portraits professional and natural.
  • Speed and Efficiency: AI-powered tools, automation, and batch editing ensure quick results with a seamless workflow.
  • On-Device Privacy: Work independently of cloud servers with full control over your library and data.
  • Tailored for Portrait Photography: Specifically designed for beauty, lifestyle, and editorial portraits with professional tools and features.

Getting Started with Aperty

If you haven’t purchased Aperty yet, you can explore the pricing guide [here]. Once ready, download and install the application on your device. For system compatibility, check the spec requirements [here]. After installation, sign in to your Skylum account to access the full suite of features and start editing your portraits.

User Interface Overview

Aperty’s design enhances workflow efficiency with intuitive navigation and user-friendly tools. If you’re familiar with Luminar Neo, you’ll notice some similarities, such as the editing tools located on the right side and a film strip catalogue along the bottom of the screen.

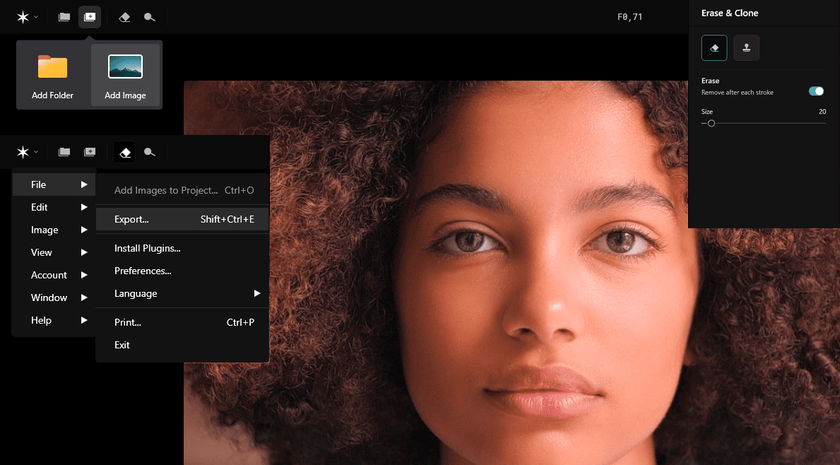
Top ToolbarThe Ultimate Guide to Editing Portraits | Aperty Blog(2)

Adding Photos

Create Project: Click the Create Project icon to organise your shoots. Name the project folder, then drag and drop your images or use the Add Photo button to import more images.

Erase Tool

Use the Erase Tool to manually remove blemishes and unwanted elements from your scene. Adjust the brush size for precision and explore the Clone & Stamp tool for further refinements. Once you’ve made your adjustments, save or discard the changes at the bottom of the screen.

Export Options

When your edits are complete, click the Export button in the top-right corner. Here, you can select the file type, quality, and save location for your work. Batch export is available, allowing you to export multiple images at once from the Film Strip.

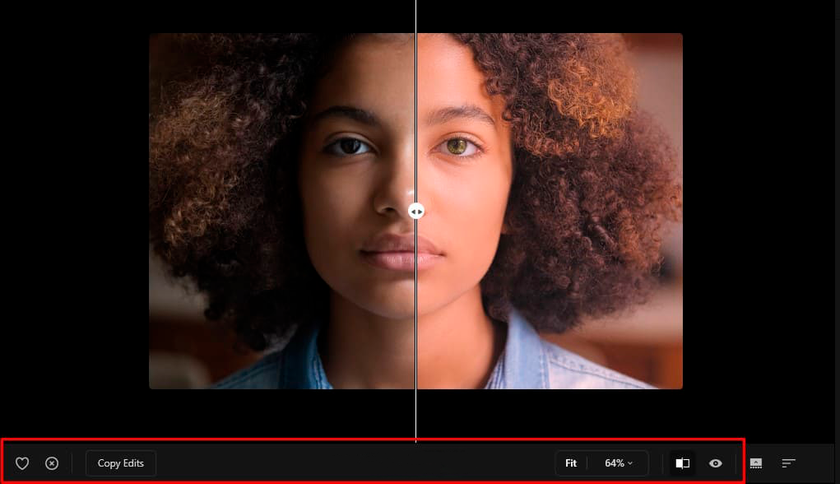
Bottom Toolbar


The Ultimate Guide to Editing Portraits | Aperty Blog(3)Flag Images

Organise your shoot by marking your favourites with the Heart Icon and rejecting others with the Cross Icon.

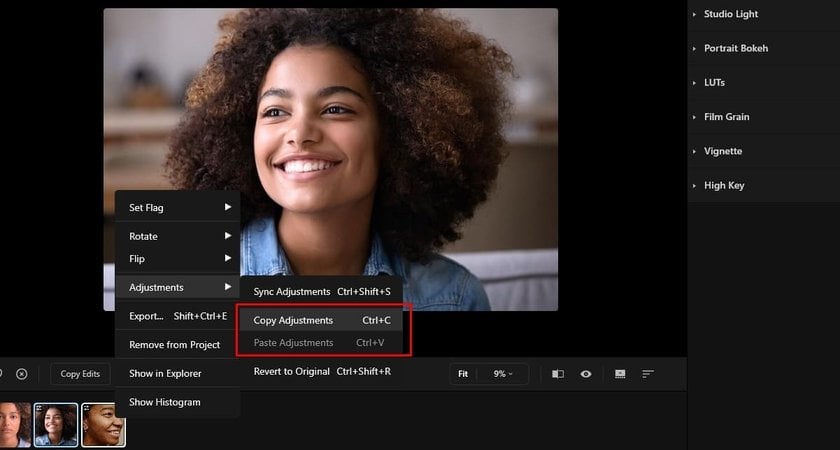
Copy & Paste Edits

The Copy Edits button allows you to copy adjustments from one image and apply them to others by clicking Paste Edits. You can reset this action by selecting the cross inside the Paste Edits button.

Before & After Comparison

Use the Before/After Icon to slide between the original and edited versions. Alternatively, click the Preview Icon (eye icon) to temporarily view the original image while holding down your mouse button.

Right Toolbar

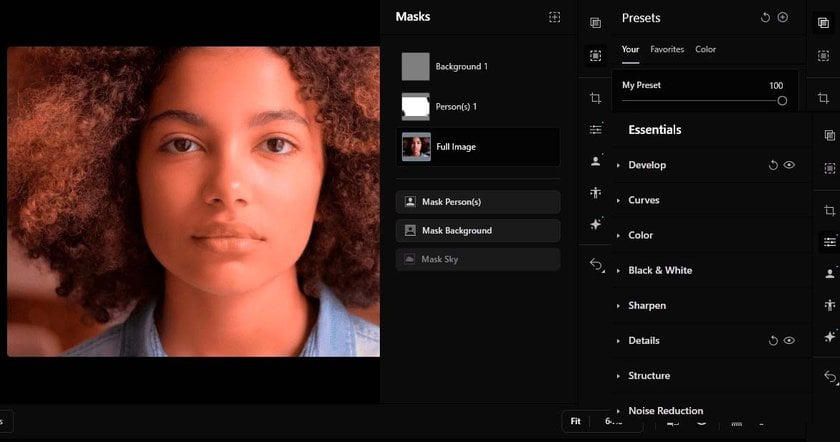
The Ultimate Guide to Editing Portraits | Aperty Blog(4)
Presets Panel

The Presets Panel stores your saved presets. Use the Create Preset button to capture your current edits for future use. The Colour tab also offers ready-made styles to experiment with.

Masking Tools

Aperty provides advanced masking options powered by AI, automatically detecting and isolating people, backgrounds, or skies. For more precision, use brush tools, gradients, and luminosity masks to refine your selection.

Essentials Panel

Control exposure, contrast, and colours with tools available in the Essentials Panel, ensuring your portraits are balanced and polished.

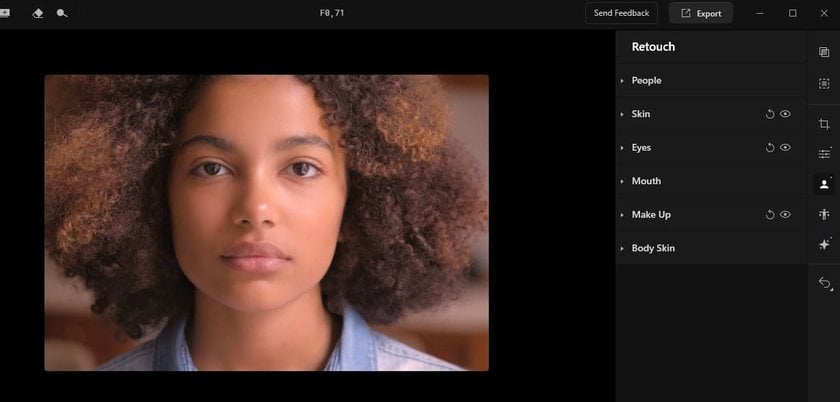
Retouch Tools

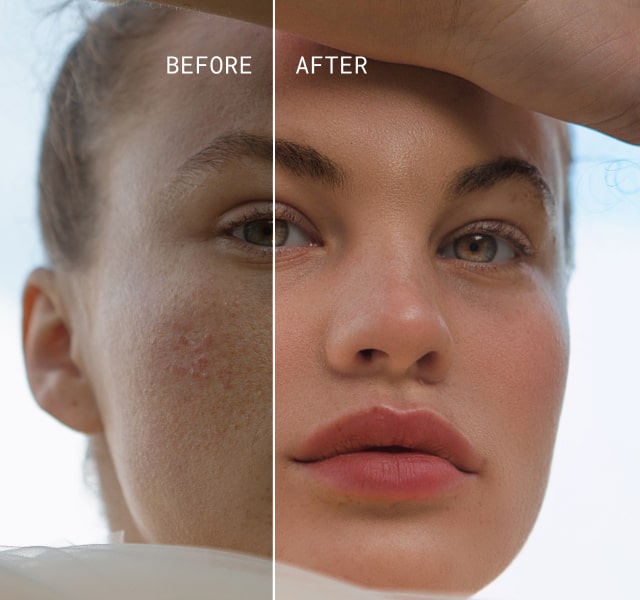
The Ultimate Guide to Editing Portraits | Aperty Blog(5)This is where Aperty shines. The Retouch Panel offers powerful tools to perfect every detail of your subject. It makes use of 3D face mesh technology and advanced segmentation to detect up to 4000 facial points (compared to Luminar Neo’s 32). This allows for more precise retouching of facial features.

  • People Tool: Select which subjects you want to work on and manage edits for either individual or multiple subjects simultaneously. This feature provides flexibility, allowing you to focus on detailed adjustments for one subject or apply consistent edits across several at once.

  • Skin Retouching: Remove blemishes and smooth skin while retaining natural textures to avoid an artificial appearance.

  • Feature Enhancement: Adjust eyes, teeth, and lips independently to enhance your subject subtly.

  • Makeup Tool: Apply makeup effects like blush, contour, and eyeliner with the 3D face mesh. This tool ensures that makeup blends seamlessly with your model’s features, offering a natural and realistic appearance. You have full control over the intensity of each effect, with additional options to adjust toning and feathering for smooth transitions, guaranteeing that the enhancements look authentic within your image.

  • Skin Tone Correction: Balance skin tones and eliminate unwanted hues, such as reds and greens caused by lighting inconsistencies.

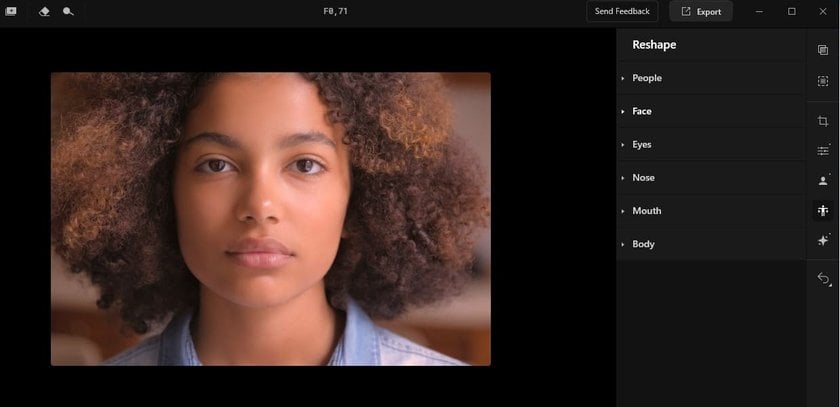
Reshape Tool

The Ultimate Guide to Editing Portraits | Aperty Blog(6)With Aperty’s Reshape Tool, you can adjust the size and shape of your subject’s face and body.

  • Facial Adjustments: Modify features such as the eyes and nose with precision.

  • Body Adjustments: Make subtle changes to the abdomen and other body areas for a natural and balanced appearance.

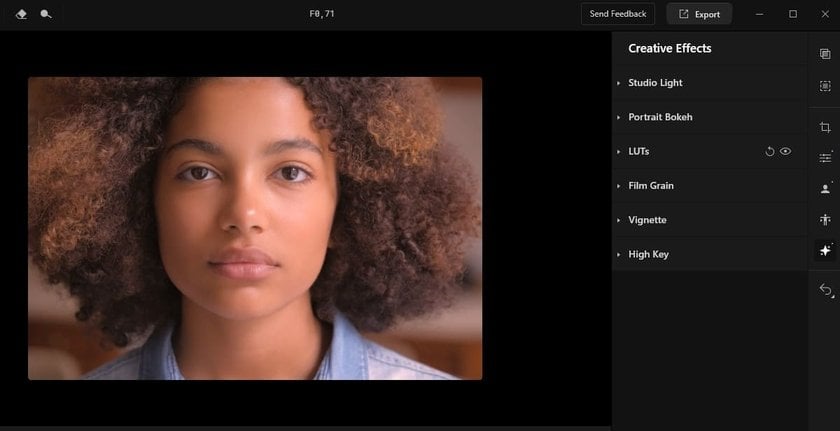
Creative Tools

The Ultimate Guide to Editing Portraits | Aperty Blog(7)Aperty offers powerful creative tools to help you apply your signature look:

  • Studio Light Tool: Simulate up to five light sources to create realistic lighting effects in post-production. Adjust the tone, intensity, and smoothness of each light source to suit your vision.

  • Portrait Bokeh Tool: Enhance background blur to draw more focus to your subject. Customise the temperature, depth, and strength of the bokeh effect for creative results.

Aperty TipsThe Ultimate Guide to Editing Portraits | Aperty Blog(8)

  • Batch Editing: Save time by applying edits across multiple images using Aperty’s batch editing capabilities.

  • Use Presets to Stay Consistent: Create and store presets for frequently used edits to maintain consistency throughout your projects.

  • Experiment with Creative Tools: Don’t be afraid to explore lighting setups and bokeh effects to develop a unique style that clients will recognise and value.

The Bottom Line

Aperty delivers a comprehensive suite of tools designed specifically for portrait photographers, providing everything you need to achieve high-quality, natural-looking results. With batch editing and advanced retouching tools, Aperty streamlines your workflow and allows you to focus on your passion: capturing stunning portraits.

Whether you’re an aspiring photographer or an experienced professional, Aperty gives you the tools to elevate your portrait work, helping you create polished, professional images that stand out.

Subscribe to know first

Our delivery owl will bring you our best deals and news about Skylum news.

Please, enter valid email!

Thank you for subscribing.