Color Grading: How to Make Colors Deeper, Not Weird
July 24, 2025
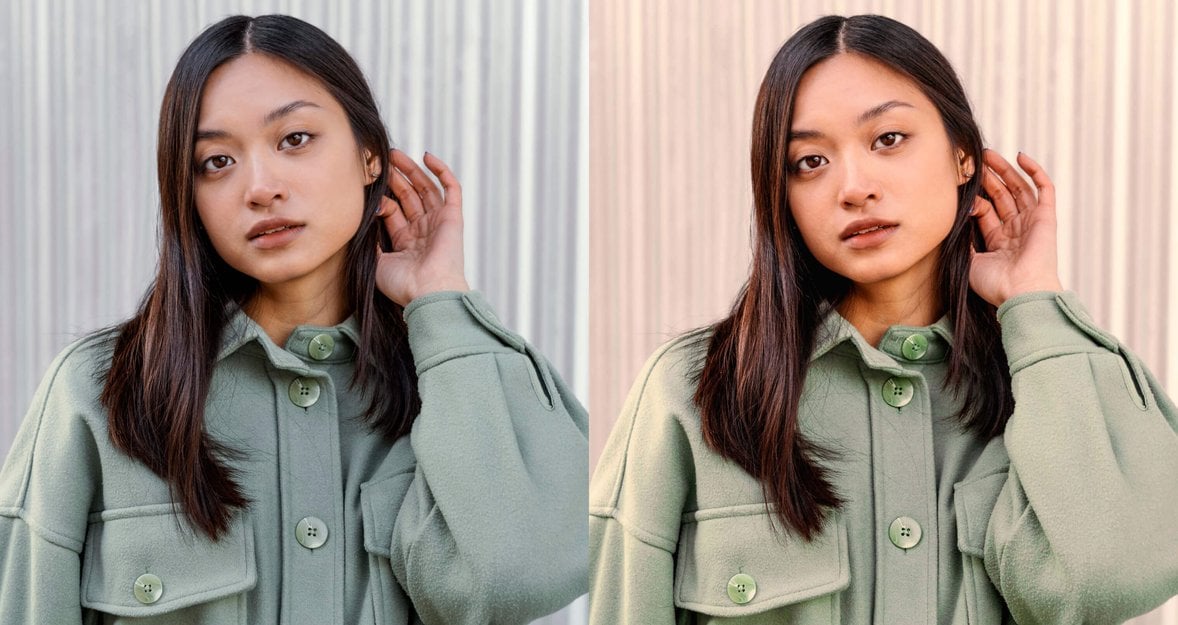
Colour grading can make or break a portrait photograph. It dictates everything from how the image is perceived to the overall mood. Bright and punchy, dark and moody, all of it can be achieved with a high-quality colour grade. However, it’s a fine line to tread, with beginners often going overboard and creating distracting palettes or undermining the atmosphere they are aiming for.
In this color grading guide, we will help you strike the right balance by enhancing colours while maintaining a polished and professional presentation that gives your portraits a high-quality finish.
What Does Color Grading Mean?
 Colour grading is the creative stage of photo editing where you adjust colours not to fix mistakes, but to set the mood and character of the image. This is what can make a shot feel warm and cozy, dramatic and cinematic, or clean and natural.
Having a solid understanding of color grading means you can shape the emotional impact of your photos instead of randomly moving sliders. In other words, if colour correction brings the photo back to what you saw with your own eyes, colour grading lets you create a new mood — showing others how you want them to feel when they look at it.
Color Correction vs Grading
These two steps sound similar, but they serve very different purposes. Colour correction is the technical part — fixing exposure, white balance, and any unwanted colour shifts so the image looks accurate and natural. Colour grading is where the creative choices happen, adding emotion, style, and atmosphere once everything is balanced.
The best workflow is simple: correct first, grade second. Skipping the correction step means your creative grade will only highlight flaws instead of enhancing the shot.
A Little Color Theory for Context
 To get the most out of colour grading, it helps to understand color grading basics—how colours interact and why they change the mood of a portrait. Colour theory may sound intimidating, but you only need the essentials:
Complementary Colours: These are colours that sit opposite each other on the colour wheel, like blue and orange or red and green. They create bold contrast and visual interest.
Analogous Colours: These are colours that sit next to each other on the wheel, such as blue, teal and green. They create harmony and a more subtle, natural look.
Warm vs Cool: Warm tones like red, orange and yellow tend to feel lively and vibrant. Cool tones like blue, green and purple feel calmer and more subdued. You can group similar tones for consistency or mix them for contrast.
Colour theory can get quite complex, but even a basic understanding can help you make better editing choices. You don’t need to be an expert to see good results, and in the next section, we’ll show you how to apply this knowledge inside Aperty.
Important Tip: Whatever direction you take your mood and the tones of your image, protect the skin tones at all costs. Otherwise your model will be distracting for all the wrong reasons.
Learn more: Portrait Lighting Setup: How to Light Your Shots Like a Pro
Prep Steps Before Colour Grading
Colour grading works best on a solid foundation. That’s why it’s smart to do a prep portrait retouching—remove distractions, even out tones, and set the right lighting. With Aperty’s AI tools, these steps are quick and set you up for better results when you start grading.
Retouching
 Those painstakingly long tasks of removing blemishes, smoothing skin and evening skin tones can all be done with one click. Aperty recognises where it needs to make changes with one key objective in mind: preserving natural skin textures. We want to avoid that over-processed look for professional-looking photos, and Aperty helps us do just that.
Make-up Application
 If you didn’t have a makeup artist with you for your shoot, worry not. You can apply startlingly lifelike makeup in post-production using Aperty’s makeup tools. Blusher, eyeliner, and even contouring can all be applied with full control over strength, tone, and colour.
Resizing and Repositioning
 Reshape the body and adjust the size and position of facial features using the Reshape tools. You have full control over the strength of each adjustment while maintaining a realistic look.
Creative Tools
 There’s really no need to switch between different applications, as Aperty offers a powerful Creative Tools menu. One standout feature is the Light Source tool, which allows you to add, reposition, and change the hue of lighting in your image. It’s a fun and flexible tool that can reshape the entire mood of your photo.
Essential Tools
 Of course, it wouldn’t be complete without the essentials. Aperty offers core editing features such as exposure control, contrast, clarity, and more. Tools like Structure add depth and detail to your image, and for those who prefer a manual approach, the classic Tone Curve tool is also available.
How to Do Color Grading with Aperty
Working with colours in Aperty, a photo studio editor, is straightforward, thanks to the masking system. Using masks is essential because we can work on colours in the background separately from our subject, which helps preserve natural skin tones. Traditionally, separating the subject from the background meant drawing a path around the model (including the tricky process of cutting around the hair).
No Limits, Just Creativity – Pick a Plan & Start Editing
See PlansAperty is designed to save you time, completing this tedious process at the touch of a button. Head to the Masking window, found on the right-side menu, second option down, and select Mask Background. This will open the Essentials tab, and any changes made from here will affect the background only.
HSL for Deeper Tones
 Beginners are often guilty of cranking up the global saturation slider to make their images more vibrant. But as we discussed earlier with colour theory, the goal is to create balance and harmony. If saturation is turned up across the board, you’ll end up with too many colours competing for attention. That’s why the HSL (Hue, Saturation, Luminance) panel is a powerful and precise tool.
We can achieve deeper, richer tones by shifting these individual parameters with colour theory in mind. Here’s how it works:
Hue – Balance Your Palette
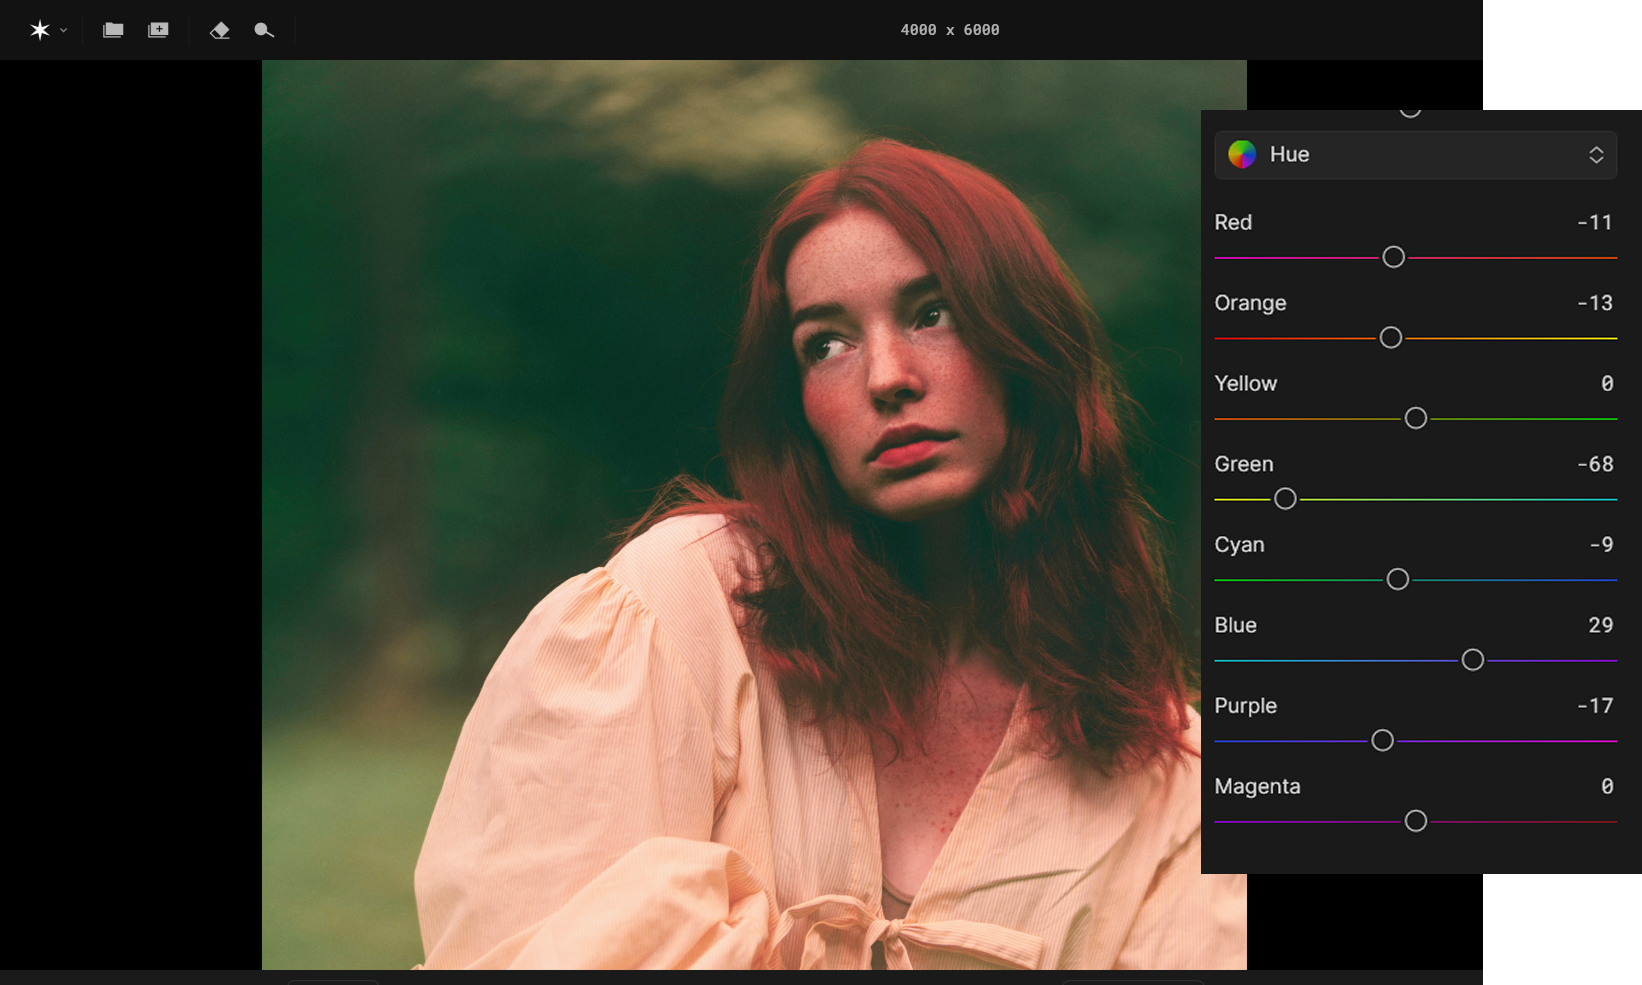 You can harmonise your tones by shifting hues slightly. For example, if green doesn’t fit the overall palette, you might shift it closer to cyan or blue to better match the look you’re going for.
Saturation – Set the Mood and Draw Focus
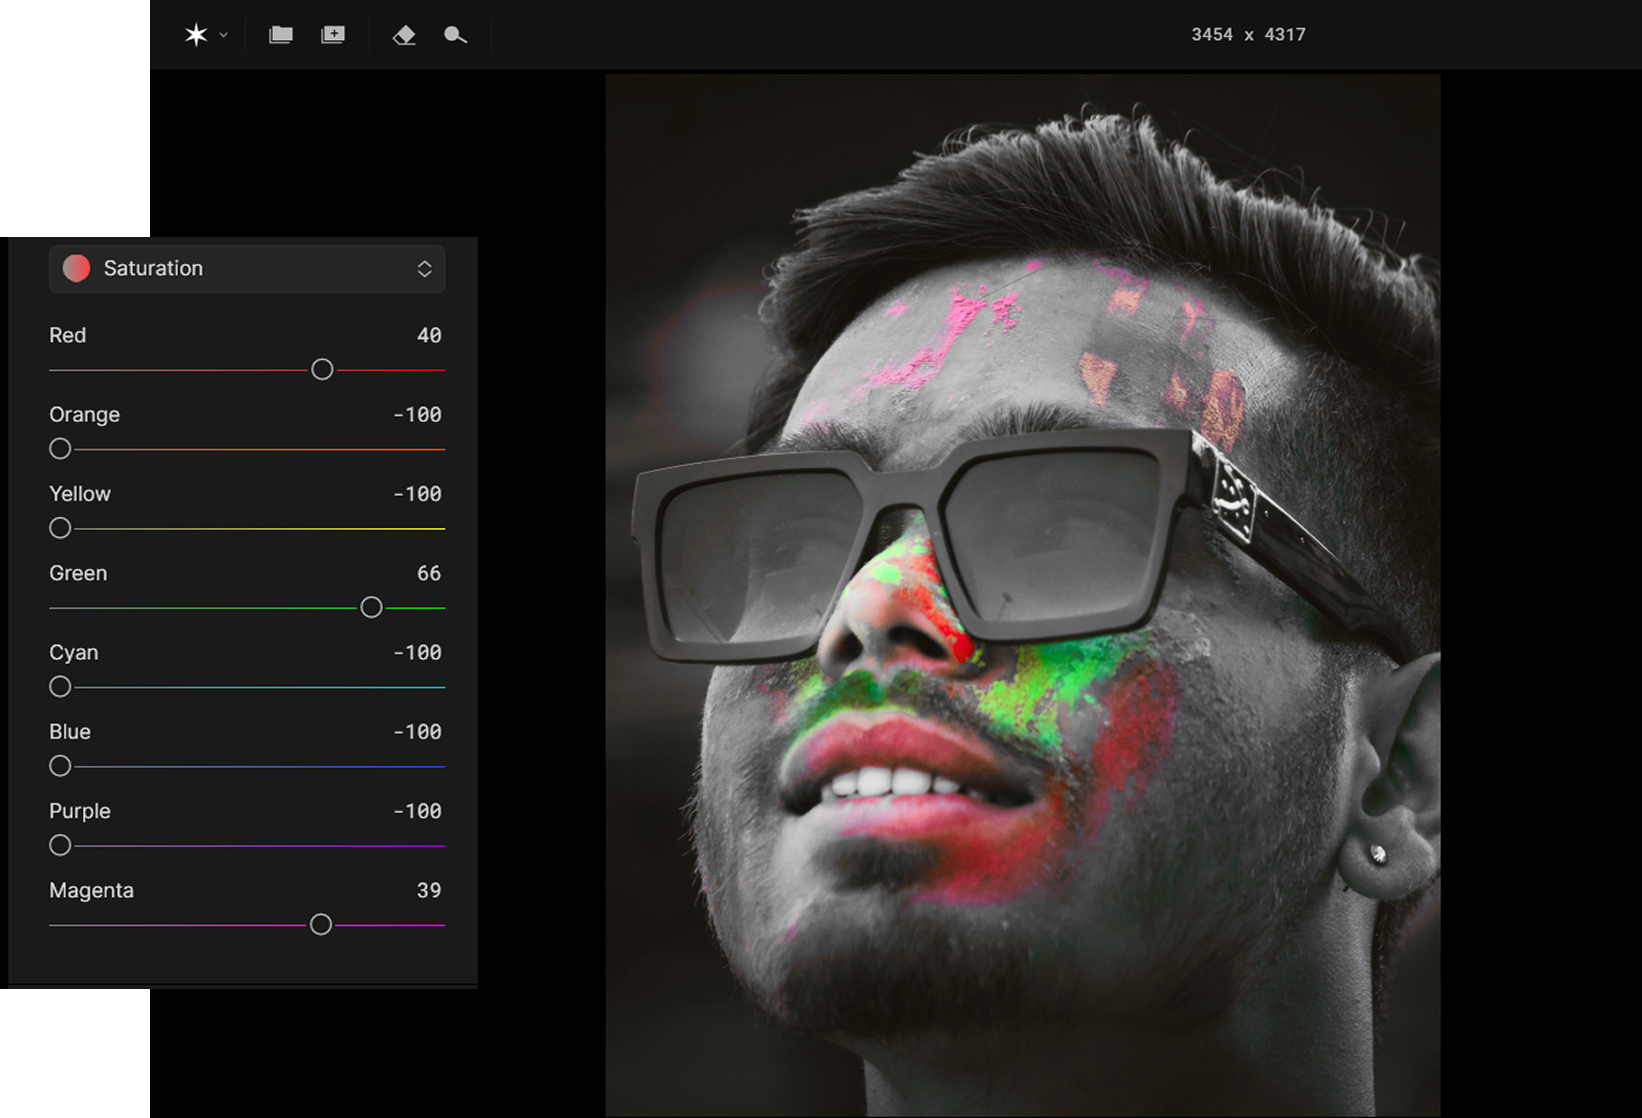 Saturation controls the intensity of a colour and should be used carefully. It can either enhance your image or push it into an unnatural, garish look.
Vibrant and punchy: Increase saturation.
Moody or cinematic: Decrease saturation.
Choose the mood you want to express and adjust accordingly, but always make sure the colours support the rest of the image and don’t become distracting.
Luminance – Create Depth and Emphasis
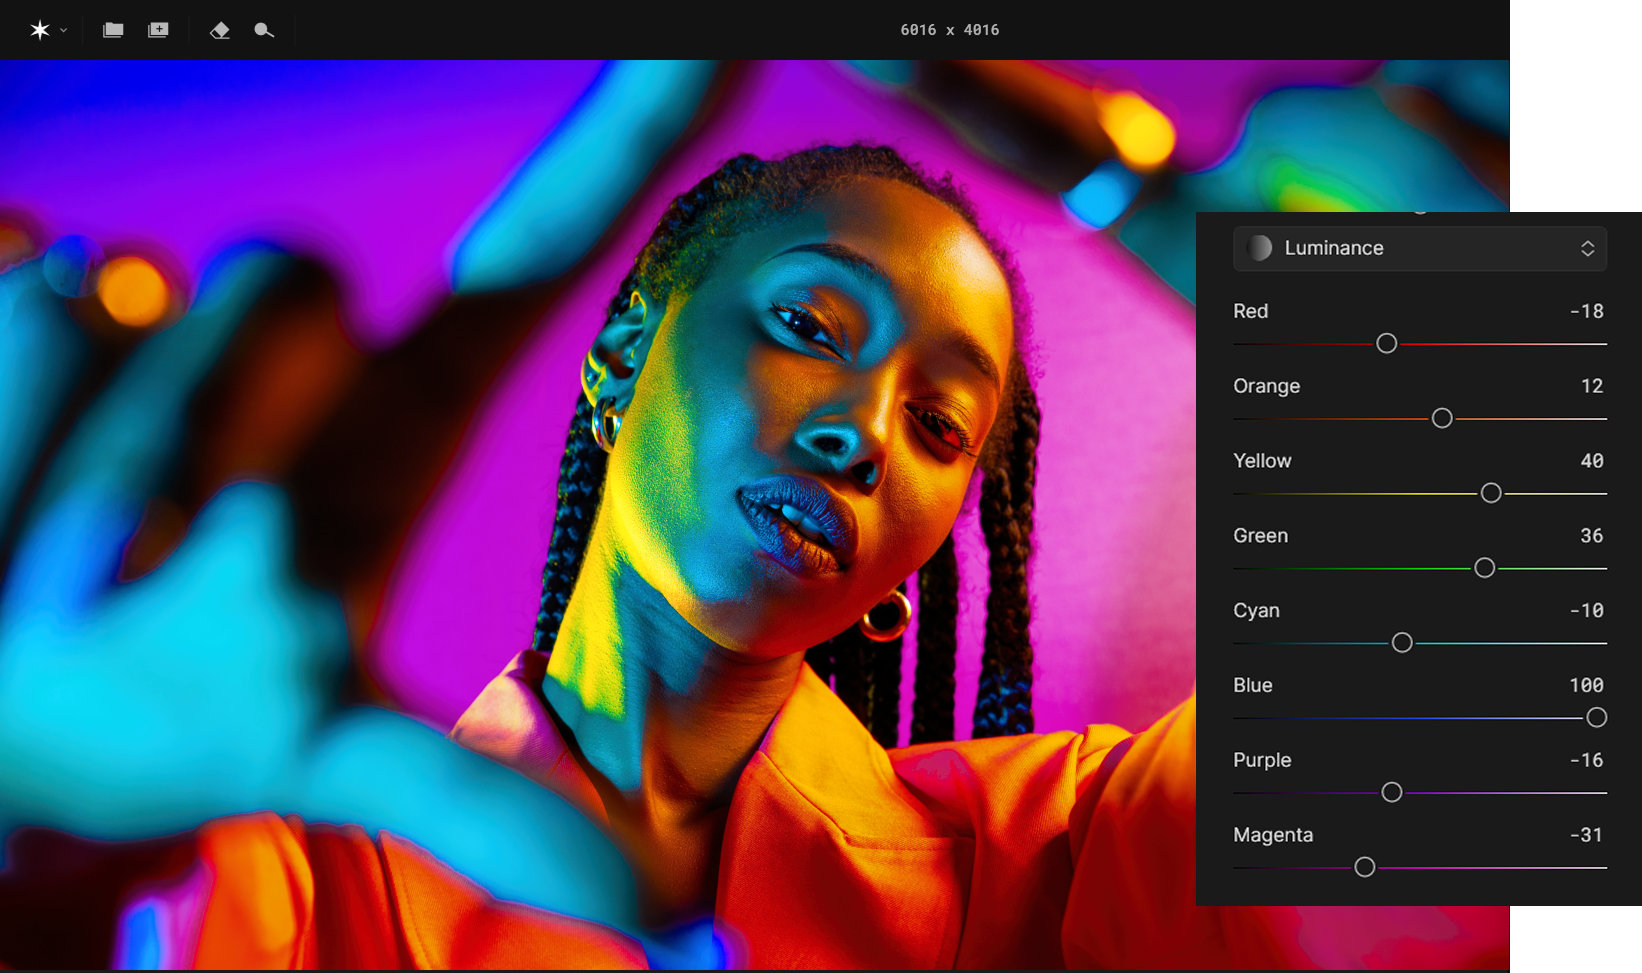 Often overlooked, luminance adjusts how light or dark a colour appears, without changing its actual hue or saturation.
Lowering luminance gives you deeper, more dramatic colours.
Raising luminance makes tones brighter and lighter.
A common approach is to darken the background slightly while keeping your subject brighter. This creates a subtle contrast that draws attention and adds depth to the image.
To summarise:
Hue – balance your palette
Saturation – set the mood and draw focus
Luminance – create depth and control contrast
This is just one method of applying colour grading inside Aperty. Now let’s take a look at some of the other tools available to you.
Other Ways to Colour Grade
We are now going to explore the Creative Tools that can help you colour grade your image. With that being said, if your goal is to deepen and refine colours, we still recommend finishing your process with the HSL panel for that final polish.
1. LUTs
 For a quicker way to deliver a mood or style, try applying a LUT (look-up table). Found under the Creative menu, LUTs offer a wide variety of looks, from warm and sunny to cool and moody. Aperty gives you full control over their application, allowing you to adjust the strength (Amount), contrast and saturation. This makes them a great starting point for creative grading.
2. Presets
 Presets should be applied at the beginning of your edit. They give you a solid base by adjusting multiple aspects of your image, including exposure, contrast, colour and more. Unlike LUTs, which only affect colour tones, presets offer a broader adjustment. Once you’re happy with your preset choice, move on to fine-tuning your tones with HSL.
3. Curve Tool
 The Tone Curve is a powerful yet often underused tool for colour grading. It gives you control over the brightness and colour balance across the tonal range of your image, from shadows to highlights.
You can work in the RGB channel to adjust overall contrast, or you can dive into the individual Red, Green, and Blue channels to control the colour grading directly. Here’s how it works:
The blue curve can be increased for cool tones or lowered for yellow tones.
The red curve can be increased for warm tones or reduced for cyan tones.
The green curve can be increased for earthy tones or reduced for magenta tones.
Remember, lowering a colour curve introduces the complementary colour:
Lower Red = adds Cyan
Lower Green = adds Magenta
Lower Blue = adds Yellow
This tool gives you a high level of control and can be a great way to introduce subtle mood shifts across your image. It’s particularly useful when you want to separate colour treatments in the shadows and highlights without affecting midtones too heavily.
Light Control
 Also found under Creative Tools is Light Control, which allows you to introduce artificial light sources directly into your image. You can control the intensity, hue and placement of the light to match or enhance the existing lighting. This feature can be used not just for realism, but also for colour grading, by tinting your added light source with warm or cool tones to affect the mood.
No matter which methods you use to colour grade your photo, finish with the HSL sliders to refine those tones and bring everything together. This will help you refine and deepen those colours for that professional polish.
The Bottom Line
When it comes to colour grading your portrait photos, Aperty has you covered. With a range of tools available, you can set the mood and achieve an eye-catching shot. However, there’s a fine balance between colours that grab attention in the right way and those that distract. That’s where tools such as the HSL sliders help, allowing you to refine and deepen colours so they appear rich and well-balanced. Using masks ensures your colour grading doesn’t affect the subject’s skin tones, giving your work a polished and professional look. Give these techniques a try and see how your photo can transform!
