Learn effective techniques for posing and angling the body to create captivating portraits. Elevate your photography with our comprehensive guide.
Working with models brings an exciting dynamic to our shoots. Not only do they help you convey your messages and stories more effectively, but they also help your viewers relate to your images.
Learning to work with models is a whole new set of skills that involves various elements. First, you need to understand the basics of lighting, colour theory, and composition that complement your model and their features. Additionally, you need to learn how to direct and communicate with the model so that their poses enhance your image, rather than looking awkward and distracting. This is exactly what we will be looking at today.
Working With a Model Basics
Before we get into ways of posing techniques, we first need to understand how to work with models. As a photographer, not only are you responsible for setting up the lighting, shooting, and editing, but you will also need to direct.
Here’s a quick guide on how to get the best out of your subject:
- Planning: When planning your shoot, it’s a good idea to let the model know exactly what they will be doing and the look you are aiming for. Send over mood boards and outline the goals of the shoot. This can also include examples of several poses that you wish to capture.
- Settle: Once the model has arrived on set, allow them a few moments to settle down. A great way to do this is to sit down with them, offer refreshments, and have a chat. This not only settles the model but also helps you build a rapport with them. They will feel much more comfortable, rather than being rushed in front of the camera as soon as they arrive.
- Review: It’s a good idea to show the model how the shots are turning out. Not only can you use this as a chance to review, but the model can also assess their performance. The model understands that the photos are in a RAW state and that there is still much work to be done before the final result. At this stage, both of you are just looking at what can be improved.
- Breaks: Make sure you give the model regular breaks. The last thing you want is for your model to become visibly tired throughout the shoot. It can be taxing on the body to run through a series of poses, especially with tighter and uncomfortable clothing. There is also lighting to consider; repeated bright flashes of light can lead to mental fatigue.
We want our model to be as relaxed and comfortable as possible so that they can bring their best performance to the shoot. You can use the breaks to touch up makeup and hair or for wardrobe changes.
Doing a photoshoot can be exciting, and we may be eager to get through the shoot to try out all of our amazing ideas. But giving adequate rest and allowing the model to settle will result in a happier model who will deliver great results.
Key Posing Techniques
Arm yourself with a catalogue of poses that you can direct your model with so that you’re not stuck for ideas during your shoot. You can save these ideas in a folder on your phone or laptop for easy reference. Think of the set of poses like a choreographed routine, allowing your model to run through all your favourite poses seamlessly, ensuring a more efficient shoot.
Standing
First, let’s take a look at standing full-body compositions. We need to ensure that the pose is flattering and also adds interest and depth.
Three-Quarter Pose
This is a classic pose that involves the subject turning 45 degrees away from the camera while keeping their face towards the camera. It is a flattering pose as it narrows the waistline and adds depth to the scene.
Weight Distribution
Have your model distribute their weight to one leg. This can create a more natural pose that avoids stiffness and adds natural curves to the body.
Movement
Full-body poses with dynamic movement add excitement to your image. This is especially beneficial if your theme requires energy, such as a sports clothing shoot. You can direct your model to simulate walking, running, and sports actions. Alternatively, you can direct your model to perform more artistic movements, such as those found in various forms of dance. You can emphasise the movement with loose and flowing clothing or with hair flying back behind the model.
Hands and Arms Positioning
"What should I do with my hands?" is a phrase we all know, but there are plenty of ways to avoid awkward hand placements in the image. You can have the model place their hands on various parts of the body, including the hips, framing the face, in the hair, or clasped together in front or behind. What we want to avoid are stiff and tense arm placements. So, if you require the hands to be down by the sides of the model, ensure they are loose and relaxed.
Creating Angles with Limbs
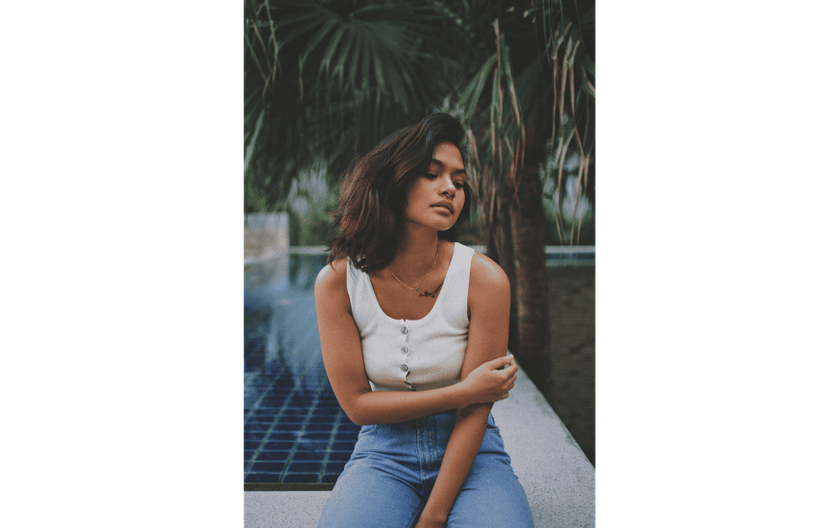
Avoid unnatural, stiff poses by having your model bend their elbows, knees, and wrists. This creates shape in your image and can create leading lines through the positioning of the limbs. For example, if you wish to draw attention to the model’s face, your model can direct their arms up towards the face and then further frame it with hand placements.
Sitting
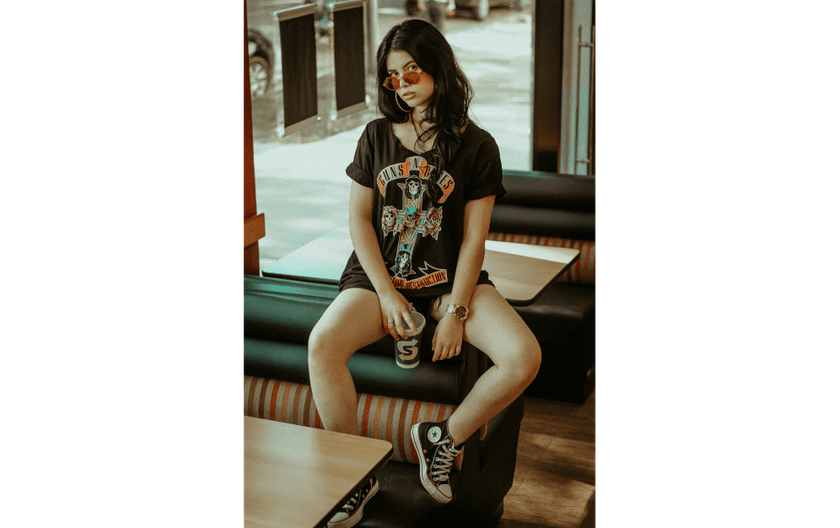
Adding furniture to your shot can develop more stylised and interesting compositions and open up a whole new area of body poses.
Posture and Alignment
Unless you are doing a project for a desk chair that promotes healthy posture, don’t be afraid to get creative with the various poses your model can strike within a chair. Get unconventional and find various ways your model can interact with the environment. This can mean leaning completely to one side, legs up or down, lying across the chair, or even leaning over the back of it. This can make for some exciting and interesting compositions.
Hands and Arm Placement
Sitting in a chair allows the model to have more natural and comfortable hand placements, rather than letting them hang awkwardly by their sides. Hands can now be placed on the armrests or in their lap. As above, you can use the hands to frame the face and create other interesting and eye-catching poses.
Legs
Now that the legs can be closer to the model’s face, we can use them for framing and leading lines. Have the model bring their legs up and create dynamic poses that direct attention to the model.
There can be times when stiff poses work, such as in quirky symmetrical shots. However, for the most part, you will want to ensure that your model is loose and creating flow and movement within your image, or using their limbs to direct attention to their face.
Using Angles to Enhance Portraits
Changing the angle from which you are shooting can leave different impressions on your viewer. These impressions are often subconscious, making it critical that your angles align with the goals and theme of your shoot:
Eye Level: With your camera at eye level with your subject, you can create a stronger connection between the subject and the viewer. It can also make the model appear more approachable and relatable.
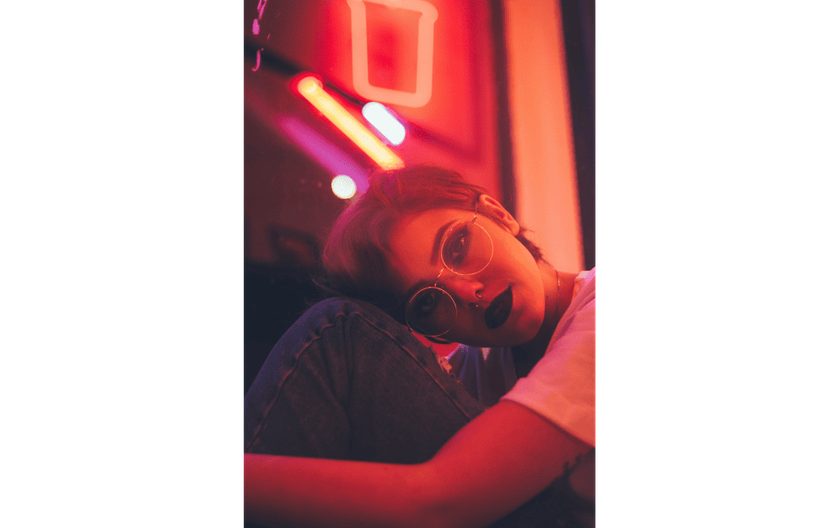
High Angle: With your camera tilted down towards the subject, you develop much different connotations than at eye level. Your subject may appear smaller, weaker, or even vulnerable to the viewer. So, if your aim is to have your subject appear powerful and heroic, you will want to avoid this angle at all costs.
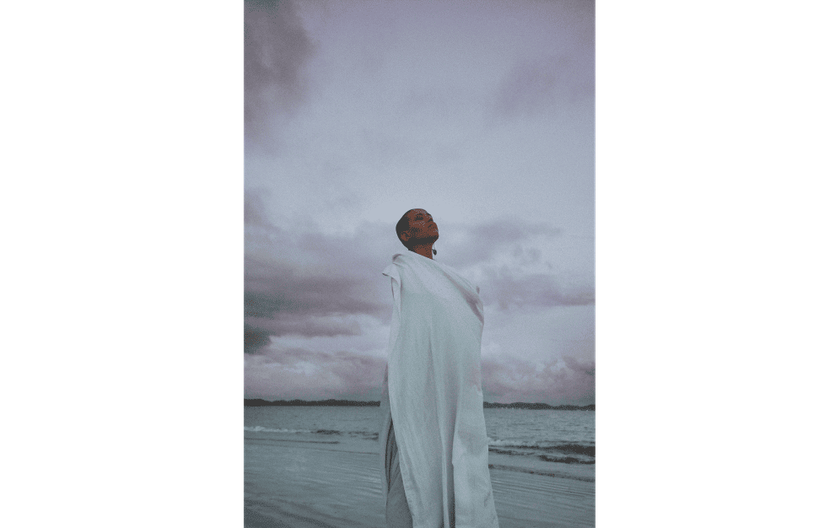
Low Angle: With your camera tilted up towards your model, you create the classic hero pose composition. This angle makes your model appear larger and creates a sense of dominance and authority. If you want to create an impression on the viewer that makes them respect your model and the themes you are aiming for, then this is the angle for you.
Your camera angle must align with the themes you are aiming for. More often, you see eye-level and low-angle shots in portraiture. These angles are far more flattering for your model and leave a strong impression on the viewer, whereas high angles tend to do the exact opposite.
Common Mistakes to Avoid
If you review your images and find something isn’t quite right about the model’s poses, check out this guide to ensure you are avoiding the common mistakes that can occur during a portrait shoot.
Mistake #1: The Stiff Statue Pose
Is your model relaxed and acting naturally in front of the camera? Notice any tension in the body, especially in the shoulders and limbs.
Mistake #2: The “Trying Too Hard” Posture
Often, when in front of a camera, people become hyper-aware of their posture and then overcorrect, standing in an unnatural position. Check that the back is straight, the shoulders are down, and the chest is up, but that none of these elements are forced.
Mistake #3: The “What Do I Do with My Hands?” Dilemma
Are you trying to achieve a hero shot, yet your subject’s hands are clasped together in front of them? Hand positions can convey body language that may conflict with the themes you are trying to communicate. We have already mentioned this above.
Mistake #4: The Forced Face
Your model’s face needs to match the theme, so any bright smiles on a serious and moody set will clash. If your model’s face looks unnatural or too posed, have them relax. A slightly pointed down chin, eyes on the camera, tongue on the roof of the mouth, and lips slightly parted create a flattering facial expression for your model.
Mistake #5: The Over-the-Top Pose
Poses that are too exaggerated and unnatural can make the composition look forced and diminish the effectiveness of your shoot. Encourage smaller movements and gradual progression, while keeping an eye on your model’s comfort.
Mistake #6: Ignoring the Power of Body Language
This is something we have touched on regarding the hands, but the whole body communicates to your viewer just by the position it is in. Become familiar with body language and understand its role in your shoot.
Mistake #7: The Silent Photographer
For a successful shoot, communication is key. Your model can’t see exactly what they are doing—only you can—so ensure you direct your model to achieve the best results. Simple instructions, praise and encouragement relayed to the model between each shot will prove effective.
Some models have their own set of choreographed moves that they run through at the sound of each shutter, while others may stand there waiting for the next direction. Regardless, you will still need to work closely with them and pose them effectively. After a few shots, invite your model over to your camera or computer to review.
As you become more familiar with working with models, you will recognise these issues more quickly and be more effective and comfortable correcting them. A model may even take time to warm up, so it’s worth running through a series of test shots where you can adjust your lighting and your model can feel more relaxed and comfortable with their poses.
The Bottom Line
Learning to work with models is a valuable skill that is wholly separate from the technical aspects of portrait photography. By learning to communicate and direct your model effectively, you will achieve better results with eye-catching and flattering images. Ensure your model is relaxed and comfortable, and aware of what is required of them by sending a detailed plan ahead of the shoot.
Be encouraging and communicate with them constantly throughout the shoot so that they know they are meeting your vision. It wouldn’t hurt to also allow them to review the images during the shoot so they can assess their own performance in front of the camera.
Overall, working with models is a fun experience, and both parties should enjoy the time spent during the shoot. Keep practising, and you will be capturing magazine-worthy shots in no time.
Subscribe to know first
Our delivery owl will bring you our best deals and news about Skylum news.